Beef Requests and the Challenges to Overcome

We have been receiving a lot more requests for frozen locker beef than ever before in the last couple of weeks. This is great and we wish that we could deliver the meat immediately! However, unfortunately our beef will be ready no sooner than December 2020, simply because this is when the calf will reach the correct weight and maturity.

Grades and Yield

One of the main challenges to raising grass-fed beef is keeping the daily weight gain high. If the calves do not gain weight on a daily basis (around 3 pounds per day) then they may begin to burn fat to make up for the lost nutrition and if too much fat is burned then the finished meat may result in a lower grade.

In general, grades consist of Prime, Choice, and Select.  Prime is considered the best grade due to it’s high content of marbled fat, resulting in the most tender steaks.  Prime also yields the most meat from a carcass. Select is the lower grade, has less marbled fat and may not be as tender. Select also yields less meat from the same carcass. So when you purchase a carcass, you get more cut up beef from prime than you would from select; therefore, prime is the better deal since you get more meat for the same dollar.

Why such a long process?

We usually reserve calves born in the spring (March) for our beef program.  The calves will be raised by their mothers until they are 8 or 9 months old and then we take them and wean them, usually in November.  At this point the calves weigh about 650 pounds.  After they are weaned we usually sell 700 pound calves in January, so the calves are now about 10 months old. The calves that we sell will be put on wheat pastures and they will continue to gain around 3 pounds per day; however, the calves that we retain for our beef program will be grazing stockpiled forage, hay, and they will be given protein supplements. The retained calves will be lucky to gain 1 pound per day.

In May when the grass turns green and begins to grow, the retained calves begin gaining weight.  They are left to graze all summer and fall and typically reach a final weight of about 1300 pounds by December, depending on the grazing conditions during the summer. At this point they are about 22 months old.

The point being made is that this is a long term process. It takes 22 months to make a finished product and it takes 12 months of advance notice to know how many calves to retain.  If we think that there will be high demand, then we hold back more calves in January. If we think the demand will be low, we hold back fewer calves in January. We must know 12 months in advance what the demand will be.

Delivery

The next problem is inventory on hand to deliver meat in a more timely fashion.  As discussed above, the delivery is always around November or December because we are only holding back calves born in the spring. There is a way around this issue, we can hold more calves back (both born in the spring and fall), graze them to 1300 pounds, and then butcher once a month for monthly delivery.

A Final Note

Finally, a note about the national meat supply: Calves are usually born in the spring or fall, but as you saw above they can gain weight at different rates in the winter causing cattle to approach harvest weight at different times throughout the year.  Feedlots are used to control weight gain on the cattle as well and keep the beef supply matched to consumer demand. In a normal situation, beef is prepared for export, grocery meat cases, and restaurants.  During this abnormal time we still have the same amount of beef but it is not getting to the end user as quickly because the restaurants are now closed. Eventually, the amount of beef headed to grocers will increase and there will be plenty of meat available on shelves again.  Once the restaurants reopen, there will be another supply jolt as beef is rerouted from grocers back to the restaurants, meaning you may see an under-supply at the restaurants and an over-supply at the grocers; eventually this will work out and supplies should return to normal.

At Grant Creek Ranch we are continuing to raise calves for the national market and our freezer beef program. We are also trying to increase our herd size so that we can provide even more calves to the market.  We will continue to grow our freezer beef business and continue to provide 700 pound calves into the national beef chain. We are glad to see that beef is a product that consumers desire!

Here are some pictures to illustrate the post!

Pictured below are the cows

And here are the bulls

New crop of baby calves that have just been born

Weaned calves, these weigh about 700 lbs and are 10 months old

These steers are mature, they are 21 months old and they weigh about 1200 pounds.

Beef Steer

Steers for our Beef Program

Burning Up: Controlled Prairie Fires

A couple months ago we conducted a controlled fire at our ranch to prepare for another year of grazing. This is a common practice for ranchers and something that is usually done anywhere from once a year to every couple of years. The main reason we do this is to burn away all the dead growth that the cows will no longer eat or gain nutrition from and make way for some new green! This is something that is crucial in maintaining forests as well and surprisingly plays an important role in preventing forest fires. The idea is basically the same for both ecosystems. By burning away the dead stuff in a controlled environment you take away the fuels that allow for an accidental fire to get wildly out of control. This greatly benefits wildlife in the area as well by stirring up insects and clearing the overgrowth to allow birds and other animals to feed, starting the food chain. Improving all sorts of animal habitats, allowing for new growth, and recycling nutrients back into the soil are all advantages that come from this method. It isn’t pretty at first but doesn’t take long for new life to spring up and really freshen the place up. If you’re interested in reading about this process from someone outside of ranch life, keep on reading! Keeping up with the ranch is definitely hard work and takes a lot of time and effort. I was glad I got to be a part of such an important day.

I rarely get to visit the ranch myself as 99% of my duties are here at the office, but I begged and begged to tag along for burn day. Ok, I didn’t actually have to beg, just remind them several times to not forget about me. Believe it or not, I WANTED to help – manual labor and all. As someone who is relaying this information to the public, I feel it is important to experience first hand what I write about. I also knew this was going to be an exciting and interesting day.

We got started early. The plan was to burn about 1100 of the 1400-ish acres we have. We were on the road at 7:30am and to the ranch by 9:00am. It’s my experience so far that these ranch trips are never just a quick “get the equipment running and go” type things, haha. We got the gators, four-wheelers, trucks, water tanks, lighters, propane tanks, drink coolers, and finally the crew all together. Being probably the most directionally challenged person I know, all that mattered to me was that I stay with a smart person so I didn’t get turned around and stuck in a place I really didn’t want to be.

We all started out together and a couple of the guys got a little fire started….then we stood there and watched. I’ll admit I was a little disappointed and worried that was it, but give it a few minutes and we had all split up with a plan. My buddy Joe (the one that taught me to drive the tractor on Ranch Day last year) and I took off some direction to some field. I honestly assumed I’d be doing a lot of watching and eventually get to try my hand at the propane wand. Nope. I was thrown in immediately and it was a lot of fun. Basically Joe drove down a strip at a constant, slow speed while I hung out the door with the wand, lighting a small fire that quickly rose and grew behind us, spreading with the wind.

Chaotic Joe and Jess Moment #1: I looked like a total city girl (which I’m really not!) and forgot my phone was in my jacket pocket. It fell out, I yelled and started to get out of the gator, but before I could even get past the door my trusty partner was over to my side, grabbed my phone, and was rushing to get back in to drive away from the flames that were quickly gaining on us. Good times…

So this is basically how the day went. I would hang out the door as long as my arm could take it, then we would switch and Joe would drive and light at the same time. After we did the perimeters of the ranch we had to go more inward and light areas to burn again. It was so important to be careful around neighbors’ land. Communication, a leaf blower, and water was key.

Chaotic Joe and Jess Moment #2: Ok, not really chaotic, but comical. At one point Joe had to help with a bigger area and hopped out, leaving me to man the gator thing “in case I had to move it away from the fire.” I didn’t realize “in case” actually meant “when.” Reverse was easy but I probably should’ve figured out how to move forward before I was alone…

This little switch in drivers became a favorite of Joe’s and he quickly became spoiled by having a chauffeur. Needless to say I was in the driver’s seat the rest of the day. My skills were put to the test as I had to burn and drive at the same time occasionally. My buddy is much better at this than me but I did it! The strength it takes to light these fires is weird. It’s not like there’s much moving involved, and while my arm did get tired I felt like I could’ve held it out all day as long as I moved positions and could prop it up against something occasionally. The true test was when Joe handed me a peanut butter cracker and I realized my arm was actually jello. I struggled (and looked incredibly dumb) trying to get the cracker to my mouth. Let me just tell you how sore I was the next day…

Chaotic Joe and Jess Moment #3: At one point I’m driving along and didn’t even realize Joe had hopped out and was walking behind getting a drink out of the cooler. He did this quite often, but at one point he had to help me relight the wand – He had trouble, the flames got closer and closer, I’m yelling for him to get back in. In hindsight, it wasn’t actually that bad. If he really thought he was in danger he could’ve taken some steps over and I could’ve driven a little away. But again, comical as I unnecessarily freaked out. I’m not comfortable with fire. Clearly.

We continued going inward. Joe got to experience my true lack of direction as we drove around a whole line of trees and he tried to tell me to drive back to where we came from. I’m not sure he understood fully that I had no clue where I was. This was probably the most fun part of the day. We lit and these fires got huge and moved quickly but they were gone faster than they appeared. We would go down one line, turn around, and were driving on what we had just burned to do another line. As entertaining as it was to watch, it also makes you realize how seriously this dead growth could cause many problems if not maintained in a controlled environment like this.

Chaotic Joe and Jess Moment #4: Have you picked up on how overly dramatic these “chaotic” moments are yet? At one point we were starting to go towards a hill to continue lighting fires, but instead a fire started racing towards us over that hill. Clearly, someone had beaten us to lighting that strip. No, we weren’t actually even remotely in danger, but as we turned around to go back the other way I really thought about how terrifying it would be to be in the wrong place at the wrong time. Fire’s no joke.

These types of comments are what get me called a dork all the time, but at some points I almost felt like a storm chaser…with fire. As relaxed and laid back as we were most of the day, safety really was a priority. Again, I say communication is key. At one point we while standing around chatting, all of a sudden someone comes on over the walkie-talkie and one of the guys mid sentence takes off running while yelling, “we’ve gotta go!” We all take off to where the rest of the gang was to help contain a fire that we were close to losing control of. This stuff happens. I felt like I was in one of my favorite movies, Twister. 

We did this all day until about 6:00pm when us Tulsans headed back to the ranch house to pack up and go home. We are fortunate to have ranch hands that live nearby to help keep an eye on things. Tired and exhausted, we finally took off at around 7:30, but (priorities first) we had to stop by Buck’s BBQ on the way home. I don’t know if it was the lack of food all day mixed with an excess of energy drinks, the fact that it was a long day of physical work, or that the food really was that good (it is), but that night I ate the most amazing steak I’ve ever had. With sides of onion rings and a baked potato, followed by a delicious slice of coconut cream pie, I went home full, happy, and sleepy. Everyone needs to make a trip up to Sedan to eat at Buck’s.

I was home by 10:30, asleep by 11:00, and back to the office by 8:30 the next morning. It was fun being greeted by my equally tired and sore coworkers, and hearing that the rest of the guys were moving a little more slowly that morning as well. I felt like I kept up well and am part of the ranch group now.

It was so fun to get out of my normal element and spend time with coworkers outside of the office. You learn a lot (such as Brian’s hatred of cedars and obsession with burning them down) and it’s great getting to share these experiences with anyone interested.

I really got to witness the hard work and long hours that are put in to maintaining a ranch and admire the teamwork and careful communication required to make safety a priority all while doing our part to preserve the prairies and take care of our cows!

This slideshow requires JavaScript.


Bonus “Recipe”: Valentine’s Special!

anniversary-art-box-1803920

It’s Valentine’s Day! A day of love and appreciation and chocolate and flowers. It just so happens to also be one of the most controversial and potentially depressing holiday of the year. Chances are you fit into one of these categories:

  • You love this day and look forward to the candy hearts and flowers you’re bound to receive from your significant other, followed by a lovely romantic dinner. You both seem to be on the same page and this is a special day for you. Or maybe one of you is into it and the other has learned it’s just best to play along. Hey, as long as everyone is happy, right?
  • You view it more as Singles Awareness Day and wallow in sadness, or better yet you realize there’s absolutely nothing wrong with being single and take the opportunity to spend a fun evening with friends or even alone – treat yourself!
  • Or, unfortunately, it’s a day of non-communicated expectations and resulting disappointment. Maybe your special person just hasn’t picked up on the subtle hints that you’d like some love too.

Regardless of where you are on the love spectrum, it all comes with its respective stresses. How about you take the stress away whether it be the crazy restaurant waits, spending money on a nice evening, or not seeing eye to eye with your SO. Have a romantic evening (or personal pampering night) and make dinner at home! You know what’s best for this occasion?

Steak.

I love that steak can fit every occasion. Throw it on a grill while drinking a beer for some low-key backyard fun, or as we’re about to do, make it the star in your very own fancy dinner. It’s a meal that you can’t really mess up, plus if you were smart you ordered beef from us and already have steaks in your freezer ready to be used! There are so many options and you get to go wild. Marinades, rubs, salt & pepper. Try something new!

beef-chilies-close-up-65175

Ladies, men love to eat. Really, I think they like to be taken care of and be the one that is provided for sometimes. They like to be nurtured and pampered too. Traditionally, Valentine’s Day is considered to be for the girls and the guys have just learned how to keep us happy. Maybe this year, make it about him and serve him up some delicious food. However, being real for a minute it’s probably still all about us.

Men, ladies actually love to eat too! They love a romantic meal and they REALLY love a man who can cook. Anyone can take a girl out to dinner and throw down a bunch of money at a restaurant, but if cooking is not something you normally do I guarantee you this is a huge gesture she will appreciate. Women aren’t that complicated. Give her food, light some candles, and show you put in a little extra effort and thought this year. You’ll win some major points.

What if it’s not about one or the other? Both of you get in that kitchen! Break open a bottle of wine a little early and have fun taste-testing and experimenting with different flavors and techniques together. Valentine’s Day doesn’t have to be a complicated, dreaded day.

If you’re spending a quiet evening by yourself, maybe make it not so quiet! Blast your fun music and dance around while you make the most amazing steak you ever have. Trust me, steak is a meal that is good with company or not.

I don’t actually have a specific recipe to share with you this month. Just some ideas. I know you probably think as a “cow blogger” I’m an expert and full of mind-blowing tricks for cooking beef. This couldn’t be further from the truth. I have to do my research just like the rest of you probably do in your kitchen. I am constantly learning and cooking steak is actually one of those things I’m still trying to perfect. I typically go with a basic oil coating and lots of salt. I love getting that crust on a steak and the amazing salty crisp. Throw in some butter, garlic, maybe some rosemary. Yum! I personally think a cast iron skillet is best for this if you’re not using a grill.

Again, I don’t think there any rules when it comes to seasoning steak. Common flavors you often see used include dijon mustard, worcestershire sauce, wine, bbq sauce, balsamic, soy sauce, fresh herbs, brown sugar, garlic, etc. Then you have more unique ingredients such as coffee, beer, liquor in general (tequila, gin), and even lavender! I came across a lavender steak rub at a craft fair type thing and passed it up. I regret it.

In searching for different recipes I came across this page filled with recipes incorporating flavor profiles from different countries. You guys, these look and sound amazing! Being completely honest, I didn’t know there were so many ideas out there before I started this article, at least not this many unique ones. Literally all I want to do is go home, cook steak all day, and try ALL of them. No joke.

https://www.foodbeast.com/news/10-steak-seasonings/

This site is also a great resource for all things beef:

https://www.beefitswhatsfordinner.com/recipes/collection/10014/flavor-boosting-rubs-marinades

Check out these sites, share your thoughts, and send us your own recipes and ideas! I will be posting mine soon. XOXO

beef-cuisine-cut-1881336


Recipe of the Month: Braised Short Ribs

It’s still winter. Still cold. These delicious, warm, crock-pot meals are still just what we need. As I mentioned in It’s a New Year!: Let’s Get Those Orders In. technically the first meal I made with my new order of beef was simply a taco bowl with ground beef, BUT this was my second and it’s worth it. This month we’re having braised short ribs.

I was excited to try this. I’ve never had them at a restaurant before and had never tried to make them myself. It’s a pretty low-maintenance recipe as they really just sit in the crock-pot for awhile and you’re done!

You guys, this is literally the best smelling meal I have ever made at my house. It’s so hard not to open the lid and sneak and sniff every ten minutes!

20190106_153817

What are short ribs?

Short ribs are the area sort of between the chuck and rib area. It’s a heavily used muscle area therefore the meat takes longer to cook to really break down those tendons and become tender. This is why short ribs are typically braised. You sear the outside and get a nice brown on them, then pop them in a slow cooker and wait. When I got mine out the meat literally fell off the bone….like, I had to fish it out of the pot.

I set my short ribs out to thaw in the fridge for a few days and when I removed the butcher paper I loved what I saw! They were so marbled and red. Let’s be honest, it looks like huge slabs of bacon which is probably what drew me to them.

Getting Started

For a basic braised short rib the ingredients are about the same on most recipes I researched, I sort of followed here and there and did what I felt like. A few notes:

1) I was stupid and didn’t trim the fat on mine. I don’t what I thought was going to happen to it but it doesn’t just disappear. Obviously I know this, but I wasn’t thinking and overlooked that step resulting in more of a mess I had to deal with when trying to remove it afterwards.

2) I didn’t weigh my ribs, I just used a whole package I had, but I’m assuming it was maybe 2-3 pounds WITH the fat. It looks like more than it was and I only got about 3 servings out of it. Granted, I didn’t serve it with mashed potatoes or anything so we ate more meat than one typically would in this meal.

20190106_153754

Ingredients:

  • 3-4 lbs beef short ribs (bone-in)
  • 1-2 Tbsp oil for searing
  • 3 cups beef broth (or 1 cup broth/2 cups red wine)
  • Thyme (3-4 sprigs or about a teaspoon of dried)
  • 1 bay leaf
  • 1 onion
  • 1 Tbsp tomato paste
  • 6 minced garlic cloves
  • Salt and pepper to taste

Process:

First you want to TRIM THE FAT. Trust me.

Then, salt and pepper the ribs, oil your skillet, and sear those beautiful hunks of meat on all sides. (I would have loved to have my cast iron skillet for this)

While doing this you can start cutting up your onions, garlic, and any other vegetables you might want to add at some point (carrots, celery, potatoes, etc.)

Place the seared ribs in your crock pot with your veggies, 1 cup of broth, thyme, and bay leaf.

20190106_160141

Back to your skillet, saute the onions until they get tender. This took quite awhile for me. I like them real soft – but this will happen in the crock pot too.

20190106_160157

Add the garlic and tomato paste, cook for a minute.

20190106_160608

Add the remaining broth (some recipes used a dry red wine. This would have been delicious but I skipped it this time.)

20190106_160914

Boil this mixture until the liquid reduces by half or so, then add to the crock-pot with the other ingredients.

20190106_161739

Cover and cook for awhile.

My crock pot has super powers and gets really hot. I went ahead and just cooked mine on high for about 2-3 hours, however you can cook it on low for up to 8 hours if you wish Unfortunately if I did that the whole thing would probably just evaporate.

Additional Tip: Make sure you pour some of that delicious broth over your ribs! To make it more of a gravy, mix a little flour or cornstarch with some water and add to the broth while stirring. It will thicken quickly.

A lot of people serve these over mashed potatoes. I just ate it as is with a side of green beans. I actually added some of the juice and onions to my beans and it was delicious!

It’s a New Year!: Let’s Get Those Orders In.

Hello readers!

It’s so good to be back to our normal routine. The last month has been very hectic with marketing, communication with customers, finalizing orders, communication with the butcher (we’re BFFs at this point), picking up and delivering beef. It’s been great but I’m ready to get caught back up and start a new year.

2018 was a success! It was our first year reaching out to the public with our beef and spreading the word about Grant Creek. We, especially I, learned a lot about the process and I feel we had a pretty smooth year. Now we’re ready to tackle 2019 and expand our customer base. My New Year’s resolution is to get us even more out in the world and continue to bring you more exciting articles and recipes!

Speaking of, I owe you a recipe. I was very excited to try a cut I have never personally made before. It was great, but you’re going to have to wait to find out the details.

So what was the first dish I made in the new year with my new batch of meat?……

….Nachos. Not very exciting. I wanted to share this picture below though. I am admittedly horrible at remembering to thaw meat ahead of time. I’m not sure it’s something that will change anytime soon. I don’t love defrosting in the microwave but I made an exception this time. This picture is AFTER I defrosted. The first thing you should notice is the plate isn’t full of liquid! Store bought beef is so often loaded with extra moisture and half of it escapes during the thawing process. It was so nice to know that I got a pound of beef and a true pound was my end result. I didn’t pay for weight I wasn’t getting in the end. 

20181230_190936

1lb of ground beef AFTER defrosting.

So now we’re starting over and want to explain what exactly that means for us. Obviously by now you’ve picked up on some aspects of our process through our blog posts and you’re familiar with some of the pros and cons of purchasing locker beef. Pros: Cost efficiency, availability and convenience, and health. Cons: Upfront Cost, can’t pick and choose, only available for purchase at certain times.

Let’s focus on that last one. We are not a retail store in which you can pick and choose what you want when you want it. Our beef is only available once or twice a year. This is something we will definitely expand on as we grow, but for now it is crucial that we know the interest of our customers early! Below is a better explanation of our process, timeline, and why we must know in advance if you are interested in placing orders.

Calves are Born

We have two separate herds of cows, one group calves in the spring (February and March) and the other group calves in the fall (September and October). About two months after they are born the new calves are gathered up and given identification ear tags. The calves remain with the herd, drinking their mother’s milk and grazing, for at least 6 months. After this time, they’re gathered up and weaned from the herd.

Calves are Weaned

The weaning time for the spring calves is November (they are approximately 8 to 9 months old at this time) and for the fall calves is May (they are approximately 7 to 8 months old at this time). At weaning time, we have to make a decision to either retain the calves or to sell the calves. For the November weaning time we will retain calves for our beef program based on the interest that we have received from our customers. The remaining calves are sold. Our usual market for the calves being sold in November is either the Eureka Sale Barn or the El Dorado Sale Barn. The retained calves are taken to our Carney, Oklahoma pre-conditioning ranch where they are weaned and then wintered. Wintering refers to the care and feed that the calves receive during the winter months when there is no available grass.  These cattle will graze forage left over from the summer, they will be given hay, and they will be given protein supplements. There is a rather high cost to wintering cattle (cost of labor, cost of hay, and cost of supplements), and we only choose to winter cattle that we know can be sold later in our beef program.

We take the fall calves weaned in May to the pre-conditioning ranch where they are weaned and then put out on Bermuda Grass pasture for 45 to 90 days.  After this period these calves are either sold or retained for our beef program. Again, any retained calves will have to be wintered, so we only retain those calves that we know can be sold later in our beef program. For these calves, this decision making time is July or August.

Retained Calves

Retained calves are pastured in Carney, Oklahoma over the winter and following summer. All of our grass-fed beef is harvested approximately 1 year after the calves are weaned.  Fall calves would be available in June the following year and the Spring calves would be available in November of the following year.  Our beef supplies are very limited since we only retain what we know we can sell. Knowing customer interest helps us to be able to determine how many of our calves to retain at weaning time.

What we need from YOU

It’s so easy to wait until the last minute for most things today, however as you have read we need enough notice to know how many calves to retain. So if you are interested in ordering for the first time, or even if you JUST received an order and know you will be out by November/December, please email us! Remember, we need a deposit to actually hold your portion. The reason we ask for this is because we have too many people express interest but then disappear when it’s closer to time. While taking people at their word would be nice, we run into problems if too many calves are retained and we get stuck with the extra beef. We need that small commitment in the beginning, but rest assured the balance is not due until the cows are slaughtered and weighed. This gives you plenty of time to save and prepare. All you need to do is go to our Contact page or fill out a Purchase Request and we will reach out to you!

Questions? Just ask! We are here to help in any way we can. We understand it can be a lot of information to take in if you’ve never purchased bulk beef before and there are no dumb questions. I promise we’re all very friendly here 😉


Get Your Freezers Ready!!

It’s almost time! We’re scheduled to go to the butcher’s on December 7th. This means two very important things:

  1. ) If you placed an order, you need to make sure you have a big enough freezer for all that beef!
  2. ) Believe it or not, we still have a VERY small amount left so it’s not too late to put in your order, but you better do it quickly. By quickly I mean, like, this week 🙂

So let’s revisit what size freezer you need. We recommend the following:

  • Whole order: 15 cubic feet
  • Half Order: 7.5 cubic feet
  • Quarter Order: 5 cubic feet

These are approximate sizes. Typically, most people seem to agree, but this can fluctuate based on the final size of your order. Also keep in mind that once you have this extra freezer you may want to store other items in it! So a little extra room might not be a bad thing.

What to look for:

This is obviously a personal choice but nowadays there are tons of cool features (pun not intended) you can get. Frost-free is a good option as it will prevent frost buildup: an important step in avoiding freezer burn. There are even some with locks to keep it child-proof or away from any nosy, hungry individuals.

Energy efficient, LED lit, adjustable temperature dials…There’s something for everyone. A good place to start is simply what style do you want? An upright freezer will function much like a refrigerator you’re used to, with a few shelves, possible door space, and a swing door. A chest freezer is like a treasure chest. The lid opens from the top to reveal something better than gold…

There are a few differences between these two, mostly being space related. An upright has more organization abilities with it’s shelves, takes up less room itself, and is easier to get things out of. I’ve also read, though, that they don’t last as long as your average chest freezer and aren’t as energy-efficient. A chest freezer is typically deeper, making it a lot easier to store large, whole items. However, it also means you may be searching around a bit more for what you need and you may have to reach farther to get items from the bottom.

Either way, these are both better options than a regular refrigerator freezer because there is enough space and it won’t be opened nearly as much, keeping that cold air from escaping and food spoiling quicker.

Where do you buy your freezer?

Luckily, you can find these things everywhere. Every major appliance store carries them. You can even find a small selection at wholesale stores like Sam’s Club or Costco! You may also get lucky on Craigslist, Facebook Market, Letgo, and other secondhand websites/apps. Just keep in mind you may be getting what you pay for.

Lastly, the price:

A 5-6 cubic foot freezer can cost anywhere from $100 to about $250, 7-8 cubic feet is around $250 to $500, and anything from 9-16 cubic feet could be anywhere from $500 to $800. Of course, this all varies between what kind and other specs.

Comment below or fill out the contact form if you have ANY questions at all about freezers and storing beef!


Recipe of the Month: Meatloaf

Agh!  I am so sorry, readers! I admit I have failed a bit and got a little behind with the recipes. To make matters worse, I don’t have pictures to share. I’ve been busy working on other exciting things for Grant Creek and let things slip a little. I’m going to justify it by saying this month was obviously taken up by Thanksgiving, so all of you have been preoccupied with other delicious foods.

I can’t believe it’s already almost Christmas! It’s definitely starting to feel like it outside. Cold weather automatically demands comfort foods and I got to thinking, what exactly constitutes a comfort food? Obviously that depends on who you are and where you’re from, I suppose. I often think of carb-loaded, cheesy, creamy, and fried foods – all with a side of bread. That could be because I grew up in the south (Technically, I don’t think Oklahoma is considered the south) but I’ve never heard a salad described as a comfort food by literally anyone. Wikipedia describes it as something that provides nostalgia – whether specific to a person or culture.

It’s not on my personal comfort food list but I know it is for many and it’s taking things down a notch from the hectic Thanksgiving cooking. This month’s recipe is meatloaf. While I have always found the name to be very unappetizing (a loaf of meat?), I can promise you this meatloaf is one of the best. It was shared with me by my wonderful mother-in-law who is allowing me to share it with all of you!

I was just talking to a co-worker this morning about the differences in recipes between my family and in-laws. I have noticed they make a lot of their foods sweeter. Deviled eggs, beans and cornbread, meatloaf. They all have a sweeter touch on my husband’s side than what I grew up with, but don’t let that fool you. I’m definitely the sweeter one. OK, just kidding. Anyway, I don’t always agree this is an improvement, but it without a doubt makes this meatloaf a winner. Instead of brown gravy or simple tomato sauce on top we’re going to make a sweet sauce using ketchup and brown sugar – sounds weird, tastes delicious. Here’s what you’ll need!

Ingredients:

  • 2 lbs ground beef
  • onion – chopped
  • green bell pepper – chopped
  • 1 sleeve of saltine crackers – crushed (fun fact: you can use crushed pork rinds for this step for a lower carb alternative!)
  • egg
  • squirt of mustard
  • Ketchup
  • Brown Sugar
  • Salt/Pepper to taste

Get Cooking:

  • Mix the beef, chopped onion, bell pepper, crushed crackers, egg, salt and pepper until well combined.
  • Form into a loaf and place in a greased 5 X 9 loaf pan. You can also use a larger baking dish or even smaller mini loaves. Keep in mind the size will determine how long it takes to cook.
  • Mix brown sugar and ketchup, adding a squirt of mustard, until you reach a desired sweetness. You will need about a cup.
  • Pour the mixture over the meatloaf.
  • Bake in the oven at 350 degrees for about 45 minutes – or until it is done all the way through.

I served mine with a loaded baked potato and green beans. Some of my favorite sides. For a less heavy meal you can always go with a side salad or grilled veggies. Comment below and let us know what you think of this recipe and what some of your favorite comfort foods are!

Myth or Fact: Common Debates Among Meat-Eaters.

We all know the internet can be a wonderful thing. Information is readily available at a moment’s notice, blah blah blah. Unfortunately, another more frequently used tool of knowledge is word of mouth and more likely than not this information is wrong. The internet is funny in that it can either perpetuate the old wives’ tales we cling to, or enlighten people about them.

Once upon a time I was the administrative assistant to the Risk Manager at a hospital. She is one of the wisest people I know and she shared a story with the staff that has stuck with me to this day. She had been tired of hearing “well, this is just how we’ve always done things” when discussing why a certain approach was taken in patient care. Her intent in sharing this story was to show this is not always the best thinking. Just because it is common practice doesn’t mean it’s correct.

The story starts with a young girl watching her mother bake a Thanksgiving turkey. Her mother put the turkey in the oven and left the oven door slightly open. The girl asked her mother why she does that and she replied, “That’s how my mother always did it.” So the girl visited her grandmother and asked her, “Why do you leave the oven door cracked when you cook the turkey?” Her response was the same. It was something her mother had always done. The girl then went to her great-grandmother and repeated her question once more to which her great-grandmother replied, “When I was young we lived in a very small house. The oven was not big enough for the turkey so the oven door wouldn’t shut all the way.”

For the great-grandmother this was not a clever strategy but a necessity. Things may seem logical at one time, or may have been in a specific situation, but we have to keep in mind the weight of certain circumstances in that moment and maybe even accept that new knowledge or circumstances has surfaced rendering the old obsolete. Society is always learning and advancing but sometimes we refuse to budge from our familiar frame of mind.

Heavy stuff, right? This is actually kind of a fun little blog post today. There are a lot of theories out there regarding prep and cooking of beef and it’s something people apparently feel strongly about on both sides. I am not here to side with either theory but to simply shine light on these common debates. The rest is up to you. I am curious to know your personal opinions and practices!

#1. Should you rinse meat before cooking?

Some believe you should rinse meat before cooking to get rid of the bacteria that reside on the surface. After all, it has been drilled into our brains that is important to rinse fruits and veggies before eating them. It only makes sense to rinse meat as well, right? However, others disagree explaining this actually does not make much of a difference at all. In cuts you would rinse such as steak and roasts bacteria only lives on the surface and those bacteria will quickly die with exposure to high heat. They believe the only thing you manage to do when rinsing meat is easily spread that bacteria to your hands, sink and counters.

#2 Will letting meat come to room temperature allow for more even cooking?

This is one I see all the time and have always been curious about. It does kind of go against everything I learned in my food health safety course when I worked in the fast food industry. This is advice offered by everyone from a back country BBQ’er to renowned chefs. If you cook a steak straight out of the refrigerator the center will take much longer to heat causing the outside to overcook. It’s usually recommended to let the meat sit for 20-30 minutes before cooking. Several people have taken to test this theory and noticed that in reality it usually takes an alarming couple of hours before you could consider meat room temperature. On top of that, they didn’t seem to notice much of a difference between cold and room temperature in the final product.  Whether this is something you believe to be true or not, it does seem universally agreed upon that this only applies to whole cuts as bacteria doesn’t penetrate the meat. You never want to let ground beef or even cuts that have been tenderized to sit at room temperature for longer than a few minutes.

#3 Do marinades make a more tender meat?

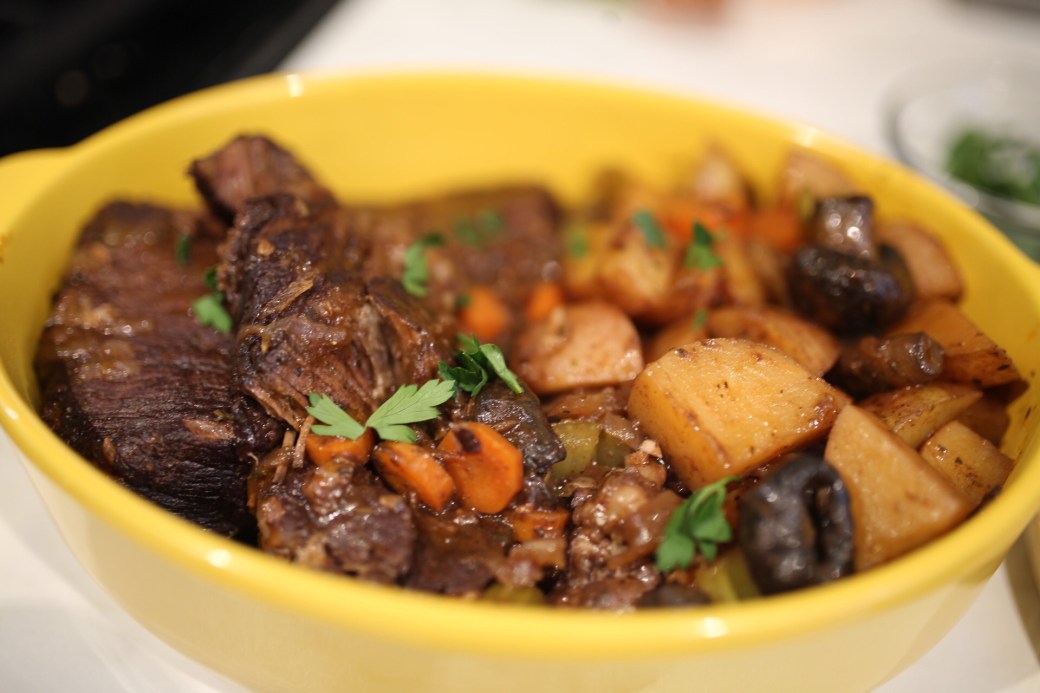
I feel like this is one of the most debated theories out there. I even said myself in my pot roast recipe post that I love when I get to marinate meat. It’s not something I do often and feel fancier when a recipe calls for it. I always think the longer the wait, the better the meal is bound to be – something I have definitely proven wrong, by the way. Some say using certain marinades, such as something acidic, can actually have the opposite affect after too long of a period. Others say marinades only penetrate the very surface of the meat, not making too much of a difference. Who knows?

#4 When should you season meat?

There is some discussion on whether or not seasoning at a certain point in the cooking process makes a difference. I remember hearing from a famous chef that you can salt a steak before cooking but you should never use pepper until after because the pepper can burn causing an unpleasant taste, or something to that affect. Then again, I’ve seen this contradicted by that same chef. Other people believe salt will draw out the moisture creating a dry, tough steak. Another idea is that this is a good thing because a dry surface is how you get that good, seared crust. What do you do?

#5 Will searing meat keep juices in?

I’ve noticed in my research that people everywhere are VERY concerned about their meat juices. It’s pretty commonly taught that searing the meat will create some sort of barrier, keeping the juices in and your meat nice and moist. It is argued that this really doesn’t affect anything and juices will escape no matter what. In fact, some people even state this CAUSES more juices to leak out. The good news is the feeling I got from most of my reading is the difference is super minimal, so it may not matter regardless of which way you tend to lean.

#6 How many times should steak be flipped?

In line with searing, the idea is that you should only flip steak once in order to not release juices, also if you keep flipping the heat doesn’t have time to reach the middle, meaning an overcooked surface or under-cooked center.  The absolute complete opposite has also been said, that flipping actually helps get a more even doneness.
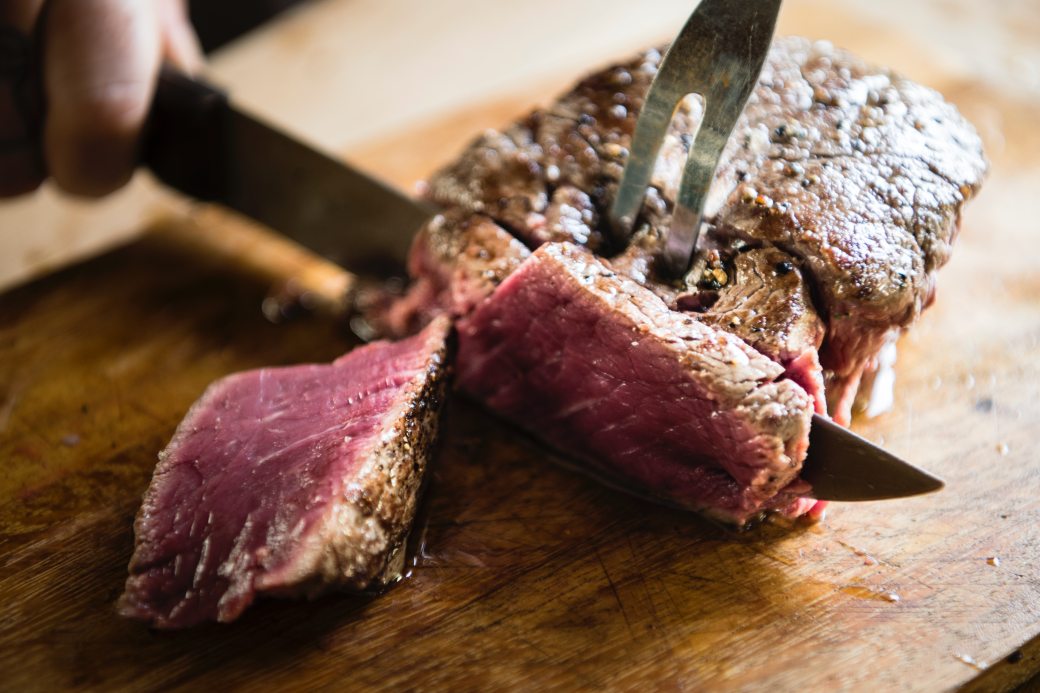
#7 Juice

Like I said above, people are serious about their meat juices. (Fun fact: Did you know the red juices you see running from beef isn’t blood? It’s actually a protein found in the muscle called Myoglobin and it dissolves in the water causing the pink liquid you often see.) For the sake of repetitiveness I’m going to group these all together:

You often hear, don’t flip with a fork, don’t cut open to check for doneness, and let meat rest after cooking. All of these revolve around avoiding loss of moisture or allowing the meat to absorb all it’s juices again. I think this is where basic human psychology comes in. When you poke a steak or roast the juices pour out of it. It looks like a lot of moisture and flavor being released!  Of course it’s going to be concerning. Apparently it’s not to some though. It is actually said that this loss is so minimal and actually unnoticeable in the meal. This is one that is probably just safer to agree to disagree with your neighbor.

#8 How to check if it’s done. 

Honestly, I didn’t even know this one existed. Most agree the best and safest way to test doneness is to use a meat thermometer, but need I remind you of the juice loss concern? So along came the “poke test” or testing with your finger or face. Now, hear me out before you start putting your face all over your steak. Apparently you can poke the meat with your finger and compare how much the meat gives with different parts of your hand or face (ex: a medium rare steak will feel like touching your thumb to your middle finger). This determines how done the meat is in the middle. Guess this depends on if your dedication lies with meat juices or clean hands.

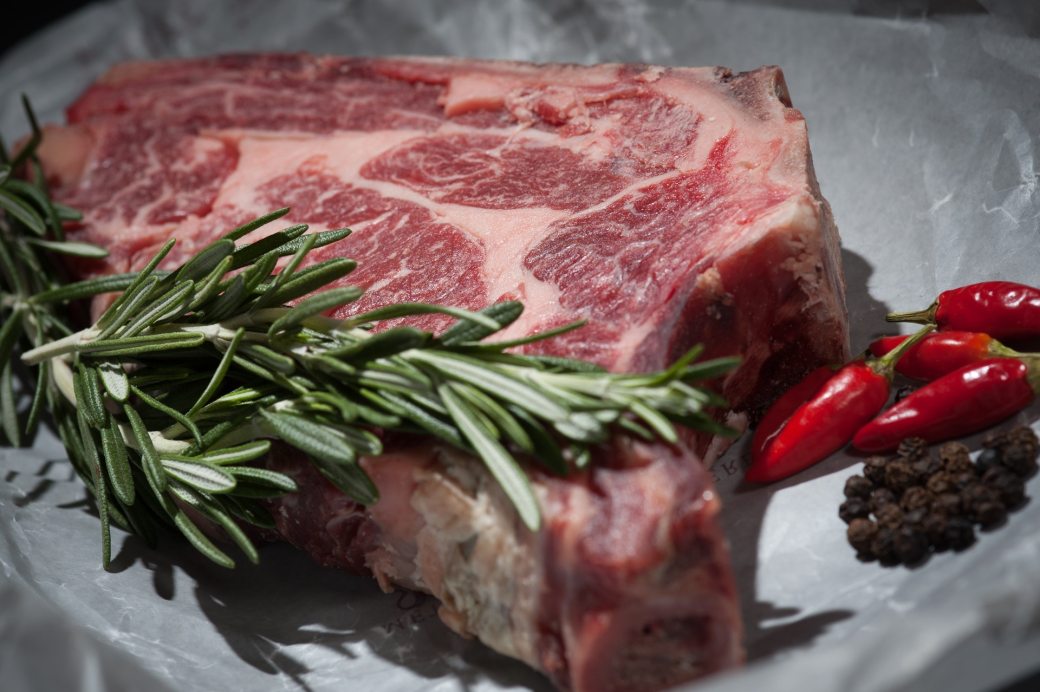
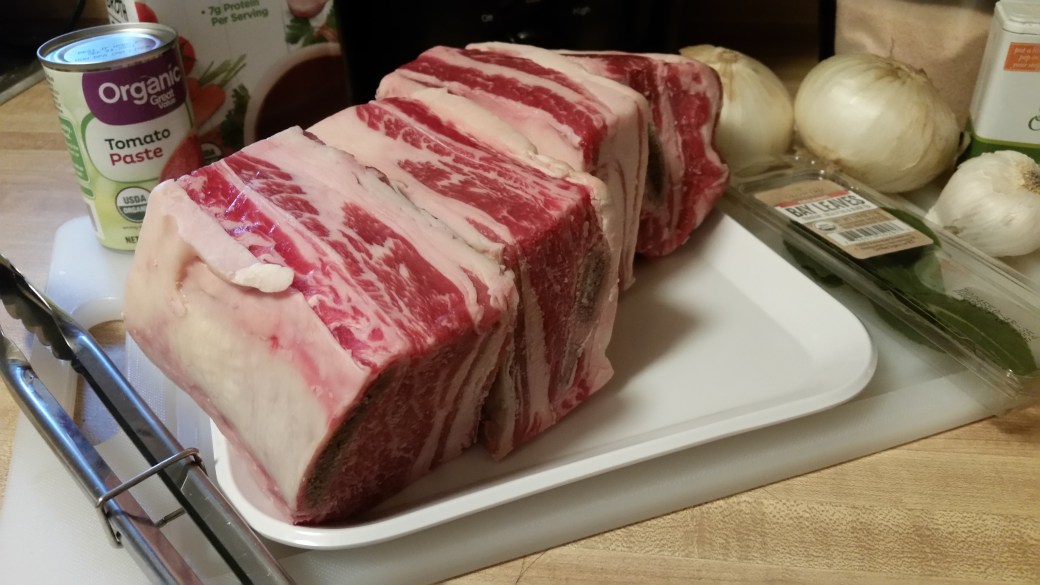
#9 Bone-in or Boneless?

Do you think this makes a difference to taste? Some people think the bone in meat will give it better flavor. This has been argued, of course. I even read about a study someone did with mashed potatoes  cooked with and without a beef bone. Some people noticed a meatier flavor in the potatoes with the bone, but most didn’t notice any difference. I’ve also read there’s more science to it (mashed potatoes aren’t the same as beef), that it is only true to the meat directly surrounding the bone, that this makes a difference in certain cuts. I personally tend to go for boneless for the convenience. I’m lazy and I like to think I’m not alone, haha.

#10 Is well done the safest way to eat meat?

I think when it comes down to it, people’s preference of meat doneness again comes down to our mentality. Some people, regardless of how good it may taste, just don’t have the ability to get over the raw-ness of a rare steak. It is easy to believe it is not safe. Others simply do prefer the taste and texture of a well done piece of meat. As I have mentioned before I think it is universally agreed that with ground beef well done is the only safe way to eat it. However with whole cuts, this may just be a personal preference.

Some bonus grill theories for you:

Will oiling the grill grates prevent meat from sticking?

A lot of people do this to make life easier. I certainly have. I’ve also read you should oil the meat directly. Something about the cold temperature of the meat keeping the oil from burning and creating a bad taste. It seems to be a debate even among celebrity chefs. Some say oil hot grates, some say oil them cold. Try it out and see what you think!

How will lifting the lid affect temperature?

Another thing grill masters seem to be adamant about is lifting the lid to the grill as little as possible to avoid a slower cooking time. I figured this to be true but actually read something interesting. Some people say it’s the heat on the surface of the meat that cooks the inside. So while opening the lid will release a lot of hot air, this does little to affect how the meat cooks. I guess some could argue that it will just take longer to maintain that surface heat.

Sear first or last?

Grilling is one of those things I so badly want to excel at. I absolutely love the crusty charred goodness on any sort of meat but it’s something I haven’t mastered without overcooking everything. Well this is one I will have to work on. It is commonly believed that you should sear your meat directly over the heat source and then move to indirect heat to let it cook the rest of the way, however it is also rebutted that you should actually cook through first and then in the last couple minutes sear to perfection, known as the reverse sear. Either way, I just need to figure out how to succeed!

So there you have it. Almost every debate you will read about how to properly cook beef. I noticed a lot of the beliefs people hold on to really make sense, but so do the opposing arguments. As with anything, it seems near impossible to get a straight true answer. So I want to know what your meat beliefs are and challenge you to be open-minded, do your own research and try something new! You may find a new game-changer technique!

Comment below!


Recipe of the Month: Wine-Marinated Pot Roast

FALL IS HERE!! This is my season. I’ve seen posts all over social media begging Fall to make it’s official appearance. Unfortunately if you’re familiar with Oklahoma weather you know how it likes to tease us. We had a beautiful week awhile back. High temperatures were in the mid 80s, there was a slight cool breeze. You better believe I was full speed into Fall mode. Sadly, the 90s visited again and everyone had retreated back inside. Fortunately for us, I think it may be back and here to stay. I knew tempting Fall with our posts about pumpkin spice and hay bales would bribe it come a little early. So doing my part to make this last I’m going to jump in with a delicious recipe I found on Midwest Living’s website.

Before I get started, I want to give a shout out to my friend and fellow blogger, Samantha, for letting me take advantage of her beautiful kitchen as well as lending her awesome photography skills. I only had to bribe her with free dinner and my company 😉 Go check out her website at www.geekedable.com for all things geeky and enjoy the upgrade from my usual recipe posts!

Delicious Grass-Fed Dinner

To start off our seasonal recipes, we’re going to use a beef chuck roast. This is another versatile cut that is perfect for roasts or stew which means a lot of savory crock pot meals. We won’t actually be using a crock pot for this dish however. It is a bit more involved and “fancier” than our other recipes. It should be fun!

Marinated Roast

The recipe will need a lot of time and dedication. It calls for marinating the chuck roast for 8-24 hours along with about 3-4 hours cooking time with some work in between. I don’t know about you but marinating is one of those things I get really excited to see in a recipe. I know there is debate about lengths of time to marinate meat, if longer than a certain time frame really makes that much of a difference, but I always feel like the meal is bound to be excellent if it takes a whole day to make. Really, marinating is not something I think to do often and only do it if I see it in a recipe rather than on my accord. I’m such an “out of the box” thinker, right? So pour yourself a glass of wine, bring the rest with you, and let’s get started!

Ingredients:

  • One 3-3 1/2 lb boneless chuck arm or shoulder pot roast
  • One 750ml Bottle fruity red wine (such as Cabernet, Sauvignon, Red Zinfandel or Merlot)
  • 1/2 Tsp kosher, sea salt or regular salt
  • 1/2 Tsp ground black pepper
  • 2 Tbsp olive oil or vegetable oil
  • One 10 1/2oz Can condensed beef broth
  • 1/4 Cup no salt added tomato paste
  • 1 Tbsp Dijon-style mustard
  • 1 Tbsp Herbes de Provence, fine herbes or Italian seasoning, crushed
  • 3 Cloves garlic, chopped
  • 2 bay leaves
  • 1 large onion, cut into thin wedges
  • 4 medium carrots, peeled, cut in half lengthwise, and halved crosswise (or 2 cups packaged peeled fresh baby carrots)
  • medium parsnips, peeled and cut into 2-inch pieces or 4 medium potatoes, peeled and cut lengthwise into sixths
  • 2 Cups whole fresh cremini mushrooms
  • stalks celery, bias-sliced into 1-inch pieces
  • Hot cooked noodles (optional)
  • 2 Tbsp snipped Italian (flat-leaf) parsley
  • Baguette-style French bread, cut into 1-1/2 inch slices (optional)

Roast Ingredients

For the detailed cooking instructions I’m going to direct you to Midwest Living’s recipe directly. They were so generous to let me share this with you! Keep reading below to follow my adventure with it. Trust me, this is a recipe you want to try.

Wine and friendship makes cooking so much more exciting. This may have to become a monthly tradition. With my ingredients and pre-marinated chuck roast in tow I headed to Sam’s house ready to get cooking and dream of the Fall days upon us.

Peachy Canyon Red Zinfandel

Sadly, I’m not a wine connoisseur. When looking at the recommendations on the ingredient list I singled out the red zinfandel. I thought, I like white so I’ll probably like red too, right? Yes, that is how my mind works. Picking the first bottle I found I ended up with this 2015 California Zinfandel from Peachy Canyon. When drinking I tend to select sweeter wines but this was yummy and worked perfectly for the recipe. I tell you what, that roast looked amazing just after marinating it. Did you see that deep red color??

Reserving the wine used to marinate the beef, I made a fragrant wine base with garlic, herbes de provence and other flavorful ingredients. I lightly browned the roast at the same time and was already ready to eat. The kitchen was filled with so many wonderful smells. I had never used herbes de provence before but instantly fell in love with the aroma. I’ll definitely be keeping in stock.

Once the wine base reduced it was time to put the roast in the oven for a few hours. This left plenty of time for philosophical talks, rants about life, discovering new shows on Netflix – all while dying to eat the amazing meal we knew was cooking.

Veggies

Finally, it was time to work on the next step so we got started on cutting up the veggies. Here’s a tip for you: Don’t drop most of your mushrooms on the floor. However, the jokes on you mushrooms. I don’t even like you. I didn’t consider this a huge loss in my book but if you do you might want to avoid sharing your ingredients with the floor.

Wine- Marinated Pot Roast

After cooking for another hour it was time to pull out the finished product. Oh. My. Goodness. The roast was literally falling apart as I transferred it to another dish. It was so tender and had great flavor. If you are hesitant about trying anything cooked with wine, don’t worry. It didn’t have a strong taste at all. It was subtle but perfect. The potatoes were the exact consistency I like. My friend had nothing but nice things to say about it as well. I think we both gave this meal an A+. Honestly, it probably could be just as good throwing everything in a crock pot for a few hours, but sometimes there is just something so satisfying about taking your time and knowing you went that little extra mile for the noticeable big flavor.

I would love to know what you think of this recipe! Please leave a comment below when you give it a try. It is sure to be a big hit with your family or your next dinner party.