Bonus “Recipe”: Valentine’s Special!

anniversary-art-box-1803920

It’s Valentine’s Day! A day of love and appreciation and chocolate and flowers. It just so happens to also be one of the most controversial and potentially depressing holiday of the year. Chances are you fit into one of these categories:

  • You love this day and look forward to the candy hearts and flowers you’re bound to receive from your significant other, followed by a lovely romantic dinner. You both seem to be on the same page and this is a special day for you. Or maybe one of you is into it and the other has learned it’s just best to play along. Hey, as long as everyone is happy, right?
  • You view it more as Singles Awareness Day and wallow in sadness, or better yet you realize there’s absolutely nothing wrong with being single and take the opportunity to spend a fun evening with friends or even alone – treat yourself!
  • Or, unfortunately, it’s a day of non-communicated expectations and resulting disappointment. Maybe your special person just hasn’t picked up on the subtle hints that you’d like some love too.

Regardless of where you are on the love spectrum, it all comes with its respective stresses. How about you take the stress away whether it be the crazy restaurant waits, spending money on a nice evening, or not seeing eye to eye with your SO. Have a romantic evening (or personal pampering night) and make dinner at home! You know what’s best for this occasion?
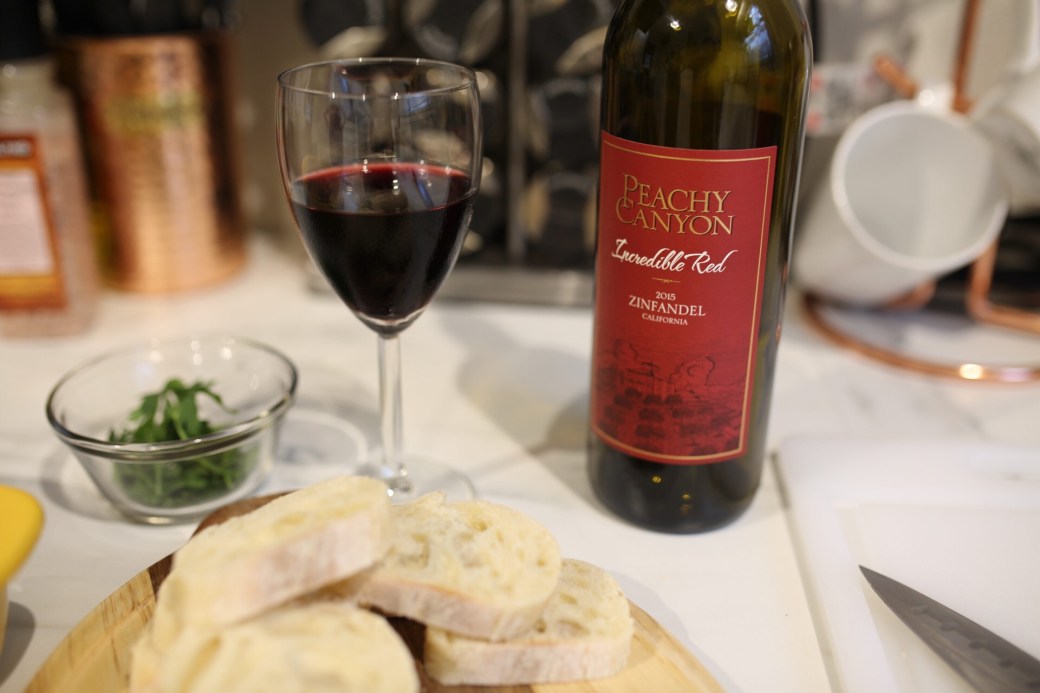
Steak.

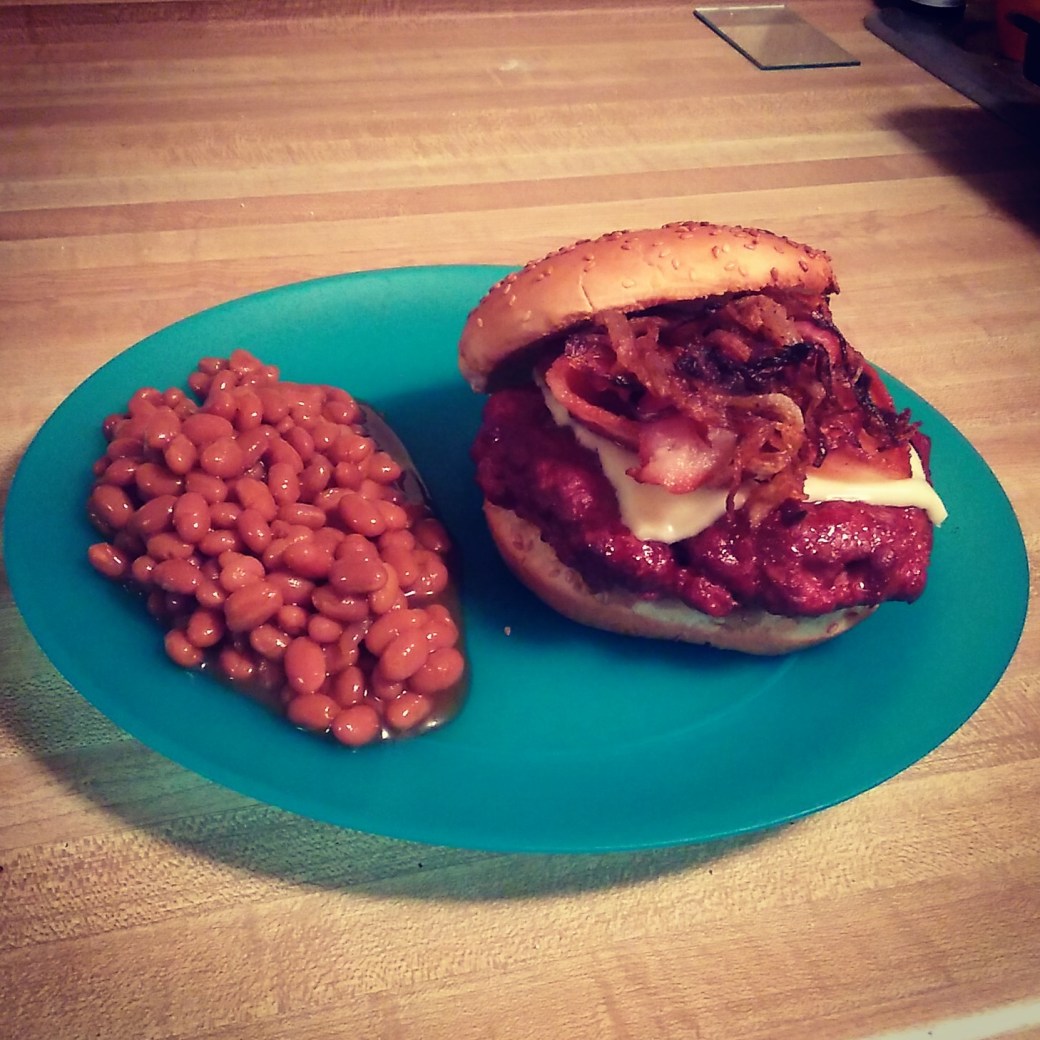
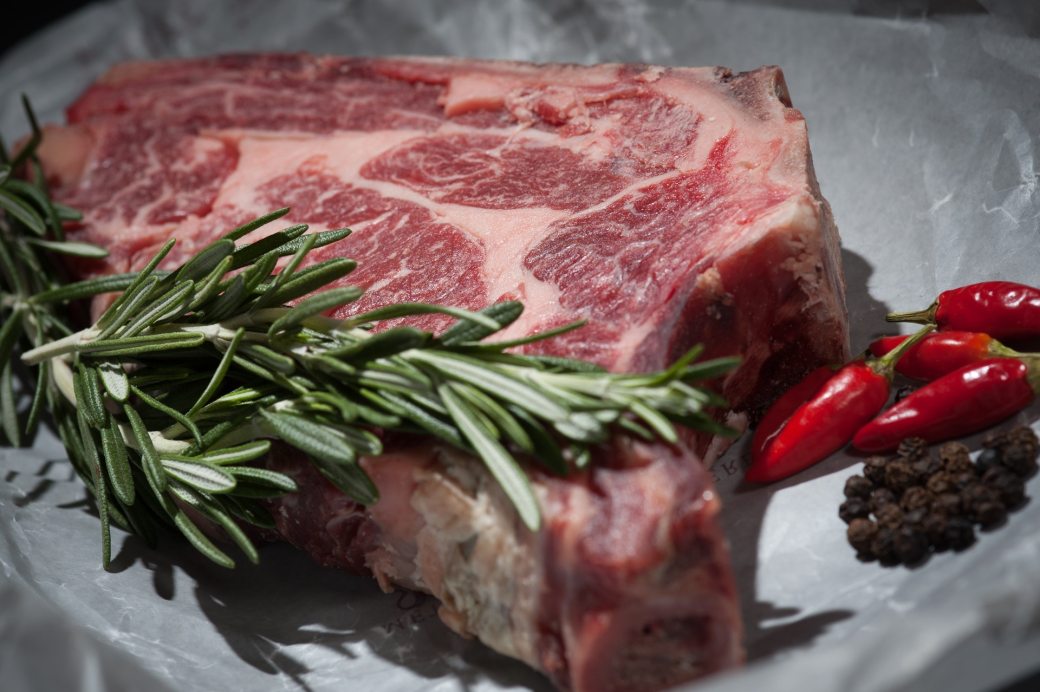
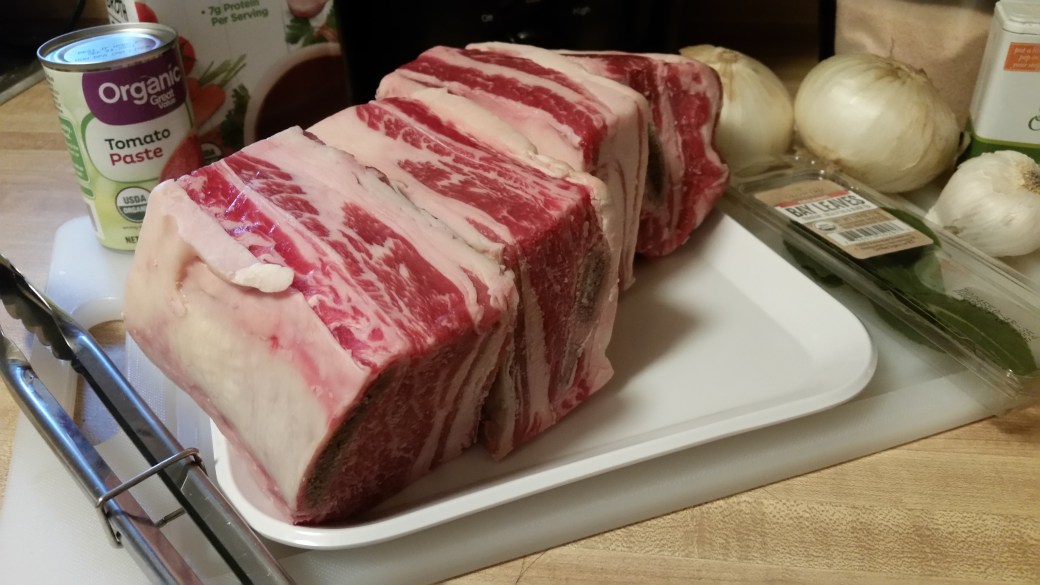
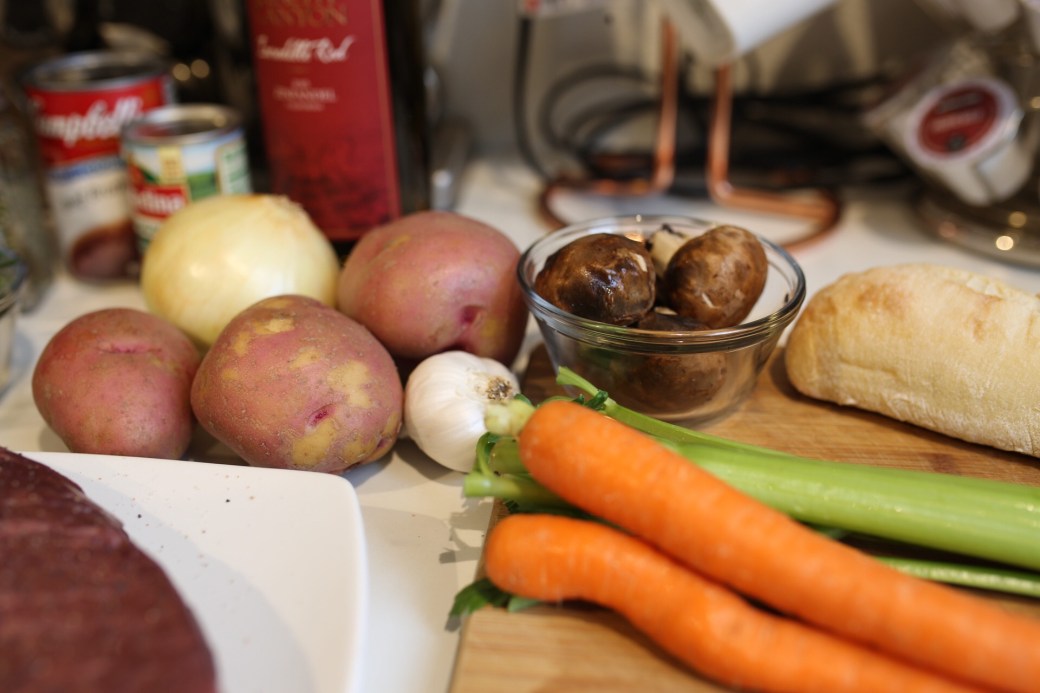
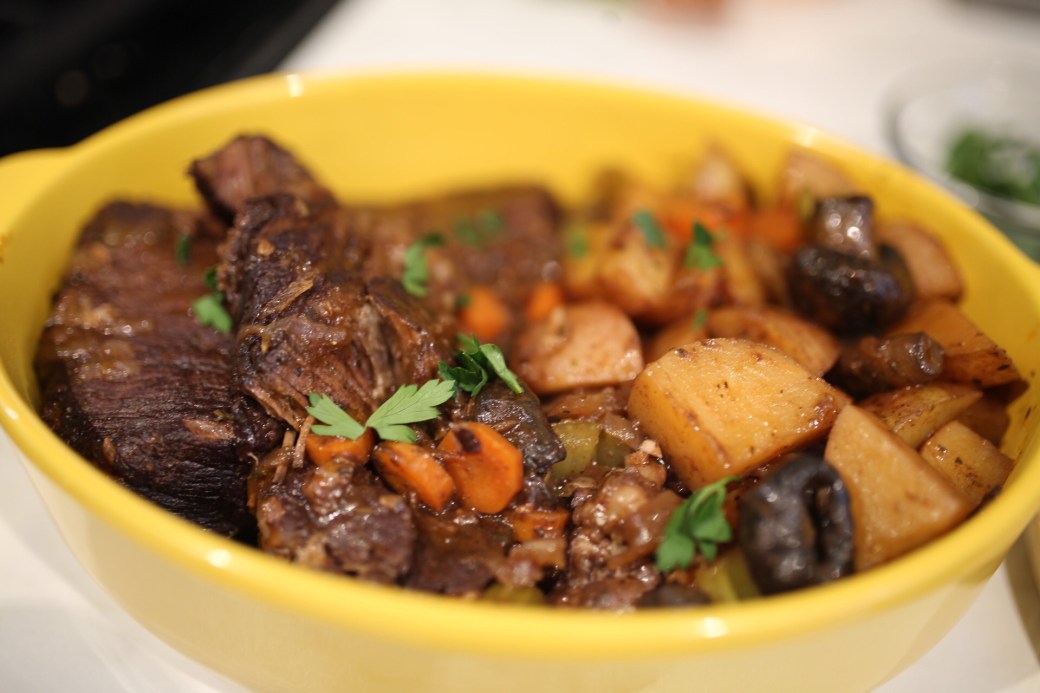
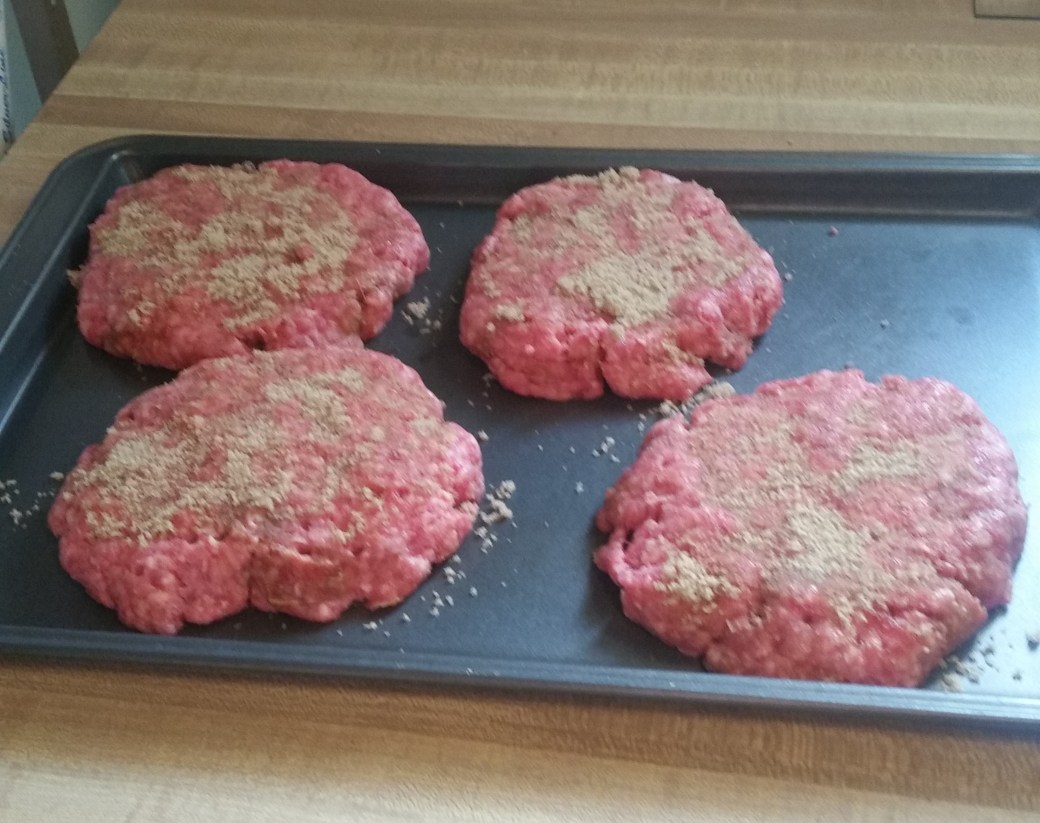
I love that steak can fit every occasion. Throw it on a grill while drinking a beer for some low-key backyard fun, or as we’re about to do, make it the star in your very own fancy dinner. It’s a meal that you can’t really mess up, plus if you were smart you ordered beef from us and already have steaks in your freezer ready to be used! There are so many options and you get to go wild. Marinades, rubs, salt & pepper. Try something new!

beef-chilies-close-up-65175

Ladies, men love to eat. Really, I think they like to be taken care of and be the one that is provided for sometimes. They like to be nurtured and pampered too. Traditionally, Valentine’s Day is considered to be for the girls and the guys have just learned how to keep us happy. Maybe this year, make it about him and serve him up some delicious food. However, being real for a minute it’s probably still all about us.

Men, ladies actually love to eat too! They love a romantic meal and they REALLY love a man who can cook. Anyone can take a girl out to dinner and throw down a bunch of money at a restaurant, but if cooking is not something you normally do I guarantee you this is a huge gesture she will appreciate. Women aren’t that complicated. Give her food, light some candles, and show you put in a little extra effort and thought this year. You’ll win some major points.

What if it’s not about one or the other? Both of you get in that kitchen! Break open a bottle of wine a little early and have fun taste-testing and experimenting with different flavors and techniques together. Valentine’s Day doesn’t have to be a complicated, dreaded day.

If you’re spending a quiet evening by yourself, maybe make it not so quiet! Blast your fun music and dance around while you make the most amazing steak you ever have. Trust me, steak is a meal that is good with company or not.

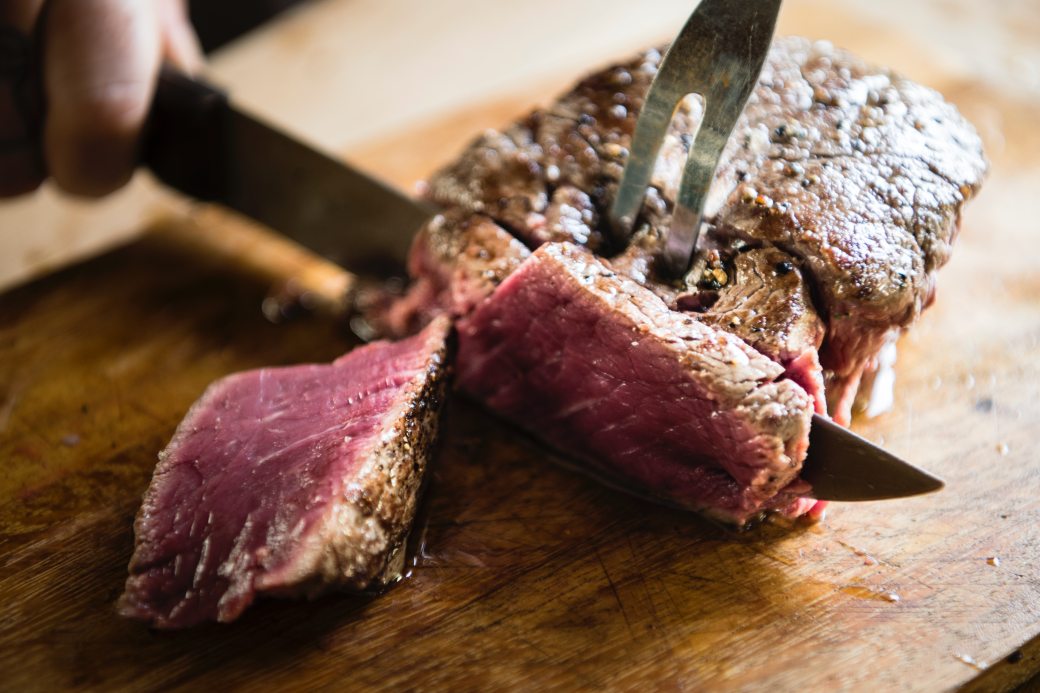
I don’t actually have a specific recipe to share with you this month. Just some ideas. I know you probably think as a “cow blogger” I’m an expert and full of mind-blowing tricks for cooking beef. This couldn’t be further from the truth. I have to do my research just like the rest of you probably do in your kitchen. I am constantly learning and cooking steak is actually one of those things I’m still trying to perfect. I typically go with a basic oil coating and lots of salt. I love getting that crust on a steak and the amazing salty crisp. Throw in some butter, garlic, maybe some rosemary. Yum! I personally think a cast iron skillet is best for this if you’re not using a grill.

Again, I don’t think there any rules when it comes to seasoning steak. Common flavors you often see used include dijon mustard, worcestershire sauce, wine, bbq sauce, balsamic, soy sauce, fresh herbs, brown sugar, garlic, etc. Then you have more unique ingredients such as coffee, beer, liquor in general (tequila, gin), and even lavender! I came across a lavender steak rub at a craft fair type thing and passed it up. I regret it.

In searching for different recipes I came across this page filled with recipes incorporating flavor profiles from different countries. You guys, these look and sound amazing! Being completely honest, I didn’t know there were so many ideas out there before I started this article, at least not this many unique ones. Literally all I want to do is go home, cook steak all day, and try ALL of them. No joke.

https://www.foodbeast.com/news/10-steak-seasonings/

This site is also a great resource for all things beef:

https://www.beefitswhatsfordinner.com/recipes/collection/10014/flavor-boosting-rubs-marinades

Check out these sites, share your thoughts, and send us your own recipes and ideas! I will be posting mine soon. XOXO

beef-cuisine-cut-1881336


Recipe of the Month: Braised Short Ribs

It’s still winter. Still cold. These delicious, warm, crock-pot meals are still just what we need. As I mentioned in It’s a New Year!: Let’s Get Those Orders In. technically the first meal I made with my new order of beef was simply a taco bowl with ground beef, BUT this was my second and it’s worth it. This month we’re having braised short ribs.

I was excited to try this. I’ve never had them at a restaurant before and had never tried to make them myself. It’s a pretty low-maintenance recipe as they really just sit in the crock-pot for awhile and you’re done!

You guys, this is literally the best smelling meal I have ever made at my house. It’s so hard not to open the lid and sneak and sniff every ten minutes!

20190106_153817

What are short ribs?

Short ribs are the area sort of between the chuck and rib area. It’s a heavily used muscle area therefore the meat takes longer to cook to really break down those tendons and become tender. This is why short ribs are typically braised. You sear the outside and get a nice brown on them, then pop them in a slow cooker and wait. When I got mine out the meat literally fell off the bone….like, I had to fish it out of the pot.

I set my short ribs out to thaw in the fridge for a few days and when I removed the butcher paper I loved what I saw! They were so marbled and red. Let’s be honest, it looks like huge slabs of bacon which is probably what drew me to them.

Getting Started

For a basic braised short rib the ingredients are about the same on most recipes I researched, I sort of followed here and there and did what I felt like. A few notes:

1) I was stupid and didn’t trim the fat on mine. I don’t what I thought was going to happen to it but it doesn’t just disappear. Obviously I know this, but I wasn’t thinking and overlooked that step resulting in more of a mess I had to deal with when trying to remove it afterwards.

2) I didn’t weigh my ribs, I just used a whole package I had, but I’m assuming it was maybe 2-3 pounds WITH the fat. It looks like more than it was and I only got about 3 servings out of it. Granted, I didn’t serve it with mashed potatoes or anything so we ate more meat than one typically would in this meal.

20190106_153754

Ingredients:

  • 3-4 lbs beef short ribs (bone-in)
  • 1-2 Tbsp oil for searing
  • 3 cups beef broth (or 1 cup broth/2 cups red wine)
  • Thyme (3-4 sprigs or about a teaspoon of dried)
  • 1 bay leaf
  • 1 onion
  • 1 Tbsp tomato paste
  • 6 minced garlic cloves
  • Salt and pepper to taste

Process:

First you want to TRIM THE FAT. Trust me.

Then, salt and pepper the ribs, oil your skillet, and sear those beautiful hunks of meat on all sides. (I would have loved to have my cast iron skillet for this)

While doing this you can start cutting up your onions, garlic, and any other vegetables you might want to add at some point (carrots, celery, potatoes, etc.)

Place the seared ribs in your crock pot with your veggies, 1 cup of broth, thyme, and bay leaf.

20190106_160141

Back to your skillet, saute the onions until they get tender. This took quite awhile for me. I like them real soft – but this will happen in the crock pot too.

20190106_160157

Add the garlic and tomato paste, cook for a minute.

20190106_160608

Add the remaining broth (some recipes used a dry red wine. This would have been delicious but I skipped it this time.)

20190106_160914

Boil this mixture until the liquid reduces by half or so, then add to the crock-pot with the other ingredients.

20190106_161739

Cover and cook for awhile.

My crock pot has super powers and gets really hot. I went ahead and just cooked mine on high for about 2-3 hours, however you can cook it on low for up to 8 hours if you wish Unfortunately if I did that the whole thing would probably just evaporate.

Additional Tip: Make sure you pour some of that delicious broth over your ribs! To make it more of a gravy, mix a little flour or cornstarch with some water and add to the broth while stirring. It will thicken quickly.

A lot of people serve these over mashed potatoes. I just ate it as is with a side of green beans. I actually added some of the juice and onions to my beans and it was delicious!

Recipe of the Month: Meatloaf

Agh!  I am so sorry, readers! I admit I have failed a bit and got a little behind with the recipes. To make matters worse, I don’t have pictures to share. I’ve been busy working on other exciting things for Grant Creek and let things slip a little. I’m going to justify it by saying this month was obviously taken up by Thanksgiving, so all of you have been preoccupied with other delicious foods.

I can’t believe it’s already almost Christmas! It’s definitely starting to feel like it outside. Cold weather automatically demands comfort foods and I got to thinking, what exactly constitutes a comfort food? Obviously that depends on who you are and where you’re from, I suppose. I often think of carb-loaded, cheesy, creamy, and fried foods – all with a side of bread. That could be because I grew up in the south (Technically, I don’t think Oklahoma is considered the south) but I’ve never heard a salad described as a comfort food by literally anyone. Wikipedia describes it as something that provides nostalgia – whether specific to a person or culture.

It’s not on my personal comfort food list but I know it is for many and it’s taking things down a notch from the hectic Thanksgiving cooking. This month’s recipe is meatloaf. While I have always found the name to be very unappetizing (a loaf of meat?), I can promise you this meatloaf is one of the best. It was shared with me by my wonderful mother-in-law who is allowing me to share it with all of you!

I was just talking to a co-worker this morning about the differences in recipes between my family and in-laws. I have noticed they make a lot of their foods sweeter. Deviled eggs, beans and cornbread, meatloaf. They all have a sweeter touch on my husband’s side than what I grew up with, but don’t let that fool you. I’m definitely the sweeter one. OK, just kidding. Anyway, I don’t always agree this is an improvement, but it without a doubt makes this meatloaf a winner. Instead of brown gravy or simple tomato sauce on top we’re going to make a sweet sauce using ketchup and brown sugar – sounds weird, tastes delicious. Here’s what you’ll need!

Ingredients:

  • 2 lbs ground beef
  • onion – chopped
  • green bell pepper – chopped
  • 1 sleeve of saltine crackers – crushed (fun fact: you can use crushed pork rinds for this step for a lower carb alternative!)
  • egg
  • squirt of mustard
  • Ketchup
  • Brown Sugar
  • Salt/Pepper to taste

Get Cooking:

  • Mix the beef, chopped onion, bell pepper, crushed crackers, egg, salt and pepper until well combined.
  • Form into a loaf and place in a greased 5 X 9 loaf pan. You can also use a larger baking dish or even smaller mini loaves. Keep in mind the size will determine how long it takes to cook.
  • Mix brown sugar and ketchup, adding a squirt of mustard, until you reach a desired sweetness. You will need about a cup.
  • Pour the mixture over the meatloaf.
  • Bake in the oven at 350 degrees for about 45 minutes – or until it is done all the way through.

I served mine with a loaded baked potato and green beans. Some of my favorite sides. For a less heavy meal you can always go with a side salad or grilled veggies. Comment below and let us know what you think of this recipe and what some of your favorite comfort foods are!

Recipe of the Month: Wine-Marinated Pot Roast

FALL IS HERE!! This is my season. I’ve seen posts all over social media begging Fall to make it’s official appearance. Unfortunately if you’re familiar with Oklahoma weather you know how it likes to tease us. We had a beautiful week awhile back. High temperatures were in the mid 80s, there was a slight cool breeze. You better believe I was full speed into Fall mode. Sadly, the 90s visited again and everyone had retreated back inside. Fortunately for us, I think it may be back and here to stay. I knew tempting Fall with our posts about pumpkin spice and hay bales would bribe it come a little early. So doing my part to make this last I’m going to jump in with a delicious recipe I found on Midwest Living’s website.

Before I get started, I want to give a shout out to my friend and fellow blogger, Samantha, for letting me take advantage of her beautiful kitchen as well as lending her awesome photography skills. I only had to bribe her with free dinner and my company 😉 Go check out her website at www.geekedable.com for all things geeky and enjoy the upgrade from my usual recipe posts!

Delicious Grass-Fed Dinner

To start off our seasonal recipes, we’re going to use a beef chuck roast. This is another versatile cut that is perfect for roasts or stew which means a lot of savory crock pot meals. We won’t actually be using a crock pot for this dish however. It is a bit more involved and “fancier” than our other recipes. It should be fun!

Marinated Roast

The recipe will need a lot of time and dedication. It calls for marinating the chuck roast for 8-24 hours along with about 3-4 hours cooking time with some work in between. I don’t know about you but marinating is one of those things I get really excited to see in a recipe. I know there is debate about lengths of time to marinate meat, if longer than a certain time frame really makes that much of a difference, but I always feel like the meal is bound to be excellent if it takes a whole day to make. Really, marinating is not something I think to do often and only do it if I see it in a recipe rather than on my accord. I’m such an “out of the box” thinker, right? So pour yourself a glass of wine, bring the rest with you, and let’s get started!

Ingredients:

  • One 3-3 1/2 lb boneless chuck arm or shoulder pot roast
  • One 750ml Bottle fruity red wine (such as Cabernet, Sauvignon, Red Zinfandel or Merlot)
  • 1/2 Tsp kosher, sea salt or regular salt
  • 1/2 Tsp ground black pepper
  • 2 Tbsp olive oil or vegetable oil
  • One 10 1/2oz Can condensed beef broth
  • 1/4 Cup no salt added tomato paste
  • 1 Tbsp Dijon-style mustard
  • 1 Tbsp Herbes de Provence, fine herbes or Italian seasoning, crushed
  • 3 Cloves garlic, chopped
  • 2 bay leaves
  • 1 large onion, cut into thin wedges
  • 4 medium carrots, peeled, cut in half lengthwise, and halved crosswise (or 2 cups packaged peeled fresh baby carrots)
  • medium parsnips, peeled and cut into 2-inch pieces or 4 medium potatoes, peeled and cut lengthwise into sixths
  • 2 Cups whole fresh cremini mushrooms
  • stalks celery, bias-sliced into 1-inch pieces
  • Hot cooked noodles (optional)
  • 2 Tbsp snipped Italian (flat-leaf) parsley
  • Baguette-style French bread, cut into 1-1/2 inch slices (optional)

Roast Ingredients

For the detailed cooking instructions I’m going to direct you to Midwest Living’s recipe directly. They were so generous to let me share this with you! Keep reading below to follow my adventure with it. Trust me, this is a recipe you want to try.

Wine and friendship makes cooking so much more exciting. This may have to become a monthly tradition. With my ingredients and pre-marinated chuck roast in tow I headed to Sam’s house ready to get cooking and dream of the Fall days upon us.

Peachy Canyon Red Zinfandel

Sadly, I’m not a wine connoisseur. When looking at the recommendations on the ingredient list I singled out the red zinfandel. I thought, I like white so I’ll probably like red too, right? Yes, that is how my mind works. Picking the first bottle I found I ended up with this 2015 California Zinfandel from Peachy Canyon. When drinking I tend to select sweeter wines but this was yummy and worked perfectly for the recipe. I tell you what, that roast looked amazing just after marinating it. Did you see that deep red color??

Reserving the wine used to marinate the beef, I made a fragrant wine base with garlic, herbes de provence and other flavorful ingredients. I lightly browned the roast at the same time and was already ready to eat. The kitchen was filled with so many wonderful smells. I had never used herbes de provence before but instantly fell in love with the aroma. I’ll definitely be keeping in stock.

Once the wine base reduced it was time to put the roast in the oven for a few hours. This left plenty of time for philosophical talks, rants about life, discovering new shows on Netflix – all while dying to eat the amazing meal we knew was cooking.

Veggies

Finally, it was time to work on the next step so we got started on cutting up the veggies. Here’s a tip for you: Don’t drop most of your mushrooms on the floor. However, the jokes on you mushrooms. I don’t even like you. I didn’t consider this a huge loss in my book but if you do you might want to avoid sharing your ingredients with the floor.

Wine- Marinated Pot Roast

After cooking for another hour it was time to pull out the finished product. Oh. My. Goodness. The roast was literally falling apart as I transferred it to another dish. It was so tender and had great flavor. If you are hesitant about trying anything cooked with wine, don’t worry. It didn’t have a strong taste at all. It was subtle but perfect. The potatoes were the exact consistency I like. My friend had nothing but nice things to say about it as well. I think we both gave this meal an A+. Honestly, it probably could be just as good throwing everything in a crock pot for a few hours, but sometimes there is just something so satisfying about taking your time and knowing you went that little extra mile for the noticeable big flavor.

I would love to know what you think of this recipe! Please leave a comment below when you give it a try. It is sure to be a big hit with your family or your next dinner party.

Recipe of the Month: Chicken Fried Steak

The amazing thing about purchasing a whole/half/quarter cow is the order is so customizable! You get to choose, within reason of course, what cuts you get, how much fat is trimmed, how thick you want your steaks, if you’d rather have more ground beef, etc. It can be overwhelming at first, which is why we want to help as much as we can. We are always available for ideas, tips, and suggestions. If you’re anything like me before I got into this, you have probably had to google what kind of meat to use for a recipe. What’s the difference between certain cuts? Is a Porterhouse and T-Bone steak the same thing?

Did you know you can get your grass-fed round roasts cut into tenderized fillets instead of individual roasts? This opens up many recipe options like the all-time favorite Chicken Fried Steak! Others include philly cheese steaks, pepper steak and rice, fajitas, and grilled round steak. These tenderized fillets are ideal because they require no additional tenderization from the cook (think pounding with a meat mallet – although a great stress release after a bad day). These fillets have been cross-cut tenderized at the butcher and then packaged in groups of two or four steaks. They have great flavor by themselves and are very lean.

Preparation of the Chicken Fried Steaks is easy! Let’s get cooking!

Ingredients:

  • 1 package of tenderized round roast fillets
  • 2 eggs
  • 1/4 cup of milk
  • 2 Cups of seasoned flour (I season with salt, mild paprika or a little cayenne pepper, and lots of pepper)
  • Salt to taste
  • Pepper to taste
  • Canola Oil

IMG_20180804_172957797

To Prepare:

  • Beat the two eggs in a shallow, wide bowl (you are going to dredge the steaks in these bowls so they should be large enough to fit the steak in them) with milk until very well mixed.
  • In a second shallow, wide bowl add the seasoned flour (Instead I used a ziplock baggie to use the good ol’ shake and bake method. This is not recommended, however, as the steaks are thin and flexible and fold in on themselves. I ended up having to work with it a bit)
  • Pat the steaks dry with a paper towel and then season generously with salt and pepper (What’s your preference? More pepper or more salt?)
  • Take the seasoned steak and dredge it in the flour bowl, forcing flour into the meat with your fingers.
  • Remove the steak from the flour bowl and then soak it in the egg mixture.
  • Repeat the flour coating one more time. This is important to get that good thick breading we all like.
  • Put the steak on a rack and repeat this process for all the steaks.
  • Pre-heat a cast iron skillet with approximately 1/2 inch of oil covering the bottom of the skillet.

The Cooking:

  • Once the oil is hot, add a steak or steaks to the frying pan. Be careful not to crowd the steaks, there should be space between each steak in the skillet.
  • Fry over high heat for approximately 2 to 5 minutes per side until the coating is golden brown – be careful not to burn the coating by leaving the steak too long. Flip the steak and cook for half the amount of time on the second side or until golden brown.
  • Remove the steaks to a plate and place in a warmer until ready to eat.
  • These chicken fried steaks should be medium rare to medium. If you want them more well-done then you can place them back in the skillet, and then put the skillet in a 350 degree oven and bake for 15 to 30 minutes.

IMG_20180804_185048992

Grass-Fed Chicken Fried Steak is a great way to serve round steak and it is very fast to prepare once you have mastered the recipe. These steaks are great served alone with mashed potatoes and a salad, This time I went completely southern with it and paired the steak with mashed potatoes/gravy and fried okra and squash. They make great steak sandwiches. We like to have ours on a large hamburger bun, with mustard, pickles, tomatoes, and lettuce. Yum!

Let us know what you think below! Also, share your recipes using round roast fillets.

Recipe of the Month: Smoked Whiskey Bacon Burgers

Happy July! The month of patriotism, fireworks, and summer. Naturally, for this month we’re sticking to a 4th of July classic: Burgers. Perfect for your family gathering before you blow stuff up. This recipe combines good ol’ grass-fed beef with whiskey and bacon…’Merica!

I had actually come across a video from the BBQ Pit Boys a few times and decided to try my own take of their whiskey burger. This was just used as inspiration. I left out and added quite a bit, strayed from their method, and as much as I would’ve liked to be doing this in the woods with the perfect smoker like they do, I stayed on my front porch with my average, tiny smoker (Can you guess what’ll be on my Christmas list this year?). But you know what? There’s nothing whiskey, bacon, and cheese can’t make better.

Ingredients:

  • Seasoning (or any seasoning of your choice)
    • 2 Tablespoons packed brown sugar
    • 1 Tablespoon salt
    • 1 Tablespoon onion powder
    • 1 Tablespoon garlic powder
    • 1 Tablespoon ground mustard
    • 1 Tablespoon smoked paprika (love the smell of this!)
    • 1 Tablespoon ground black pepper
  • 2 Pounds Grant Creek Ranch grass-fed beef (Makes 4 burgers)
  • 2 Tablespoons Worcestershire sauce
  • 4 Tablespoons BBQ sauce
  • Crispy onion strings (Store-bought or make your own!)
  • 1/2 Cup Whiskey
  • 8 Slices Bacon
  • 4 Slices Swiss Cheese

*Disclaimer – These measurements are an estimate. I eye-balled most of it. There’s lots of freedom (pun totally intended) with this recipe.

Make It!

  • First, mix all the seasoning ingredients together. This recipe actually makes quite a bit and you can use as much or as little as you like. I had a lot left over to use for future recipes.
  • Mix some of the seasoning mixture into each 1/2 pound of beef along with a 1/4 of Worcestershire sauce each, and then form your patties. Because grass-fed is leaner, it sometimes helps to add that extra moisture you get from the Worcestershire, even if you can’t pronounce it.
  • If you have rings you can form the patties in, that’s great. If not, you can make one out of aluminum foil, although this step isn’t completely necessary. It just helps to hold everything together, especially when you pour the whiskey on top.
  • Poke holes in your patties and put a layer of brown sugar on top. You can also use more of the seasoning mixture above. I personally would use more brown sugar than I did next time.

Prepped Patties
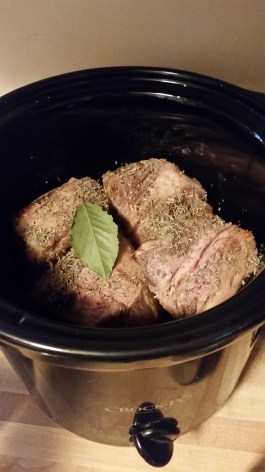
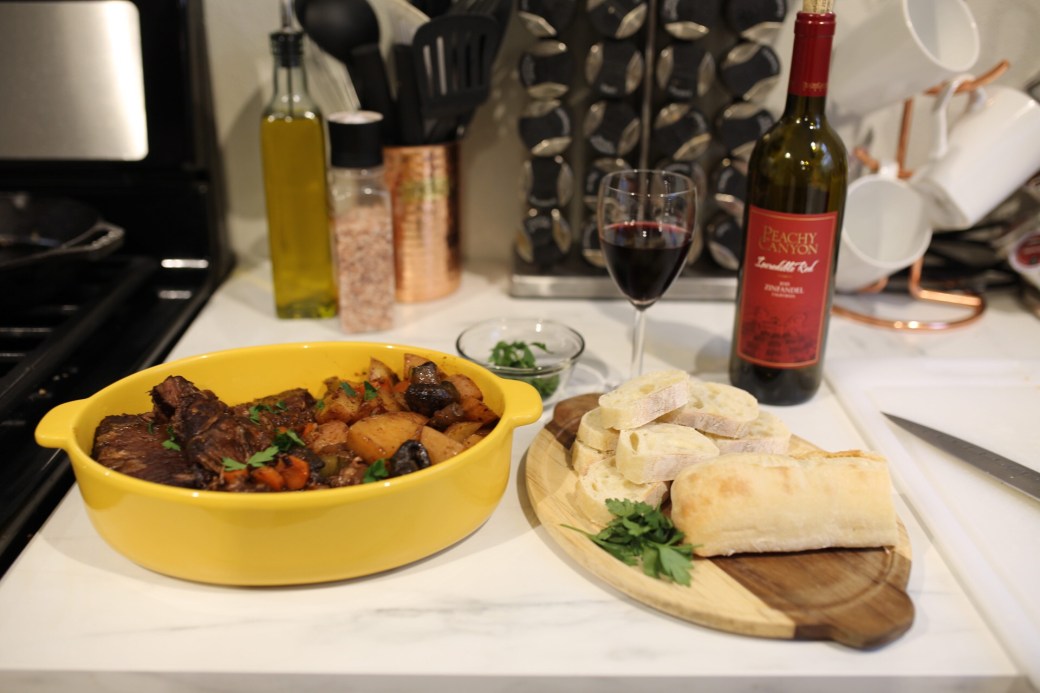
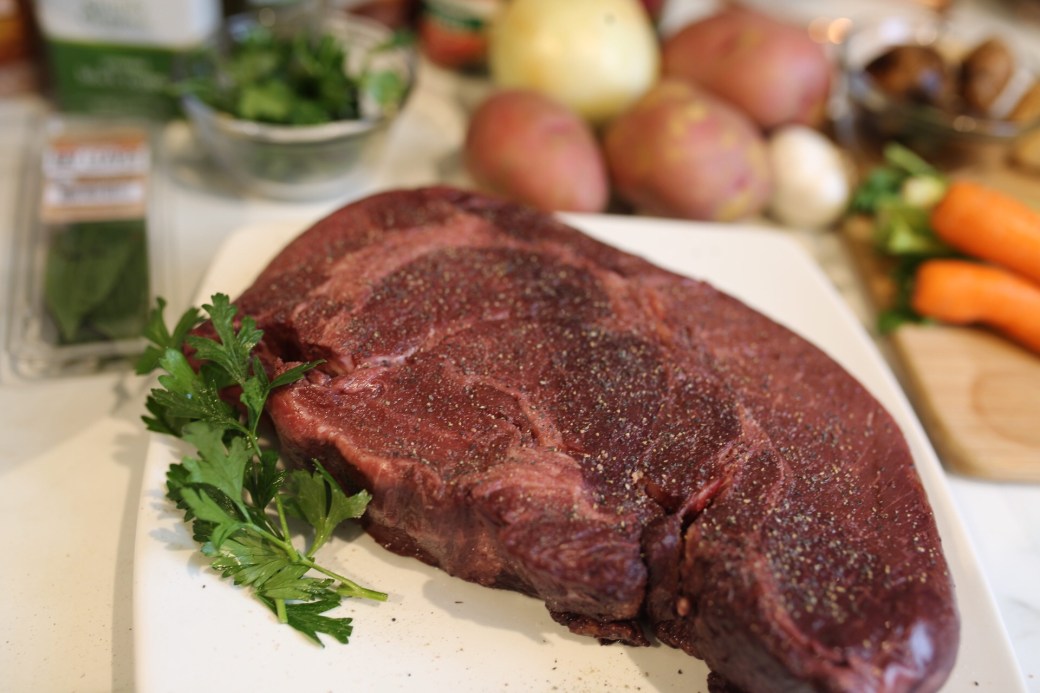
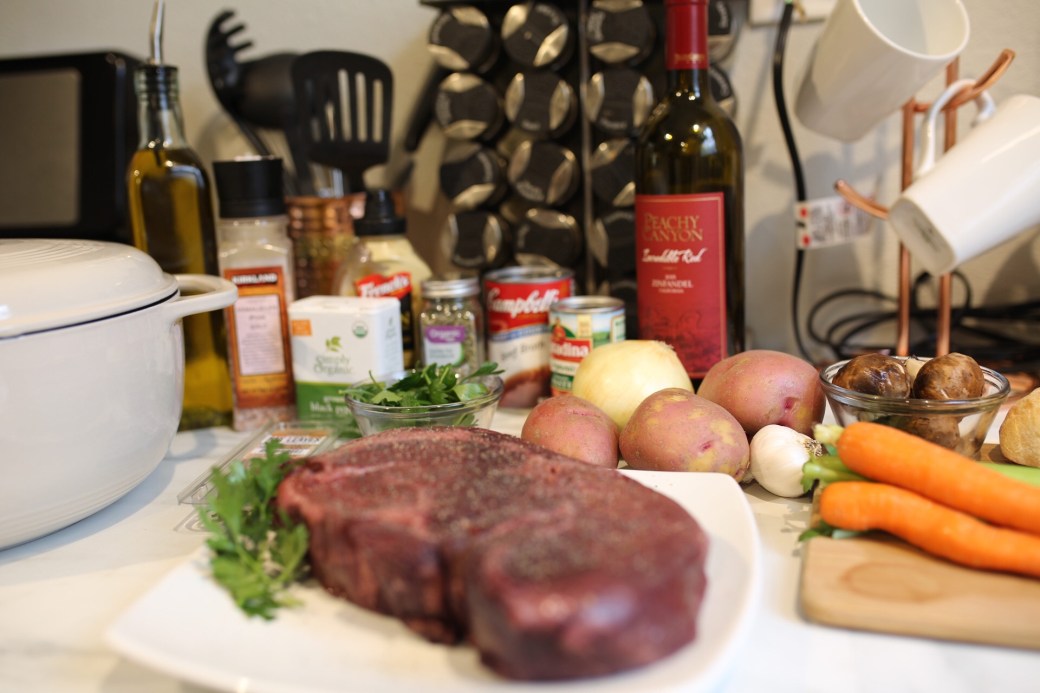
(Please ignore the poor quality of my photos. We’re in a remodeling process and my lighting is not the best)

  • Drizzle a tablespoon of BBQ sauce over each patty. (I forgot this step)
  • Pour a tablespoon of whiskey over each patty.
  • Let sit for at least 30 minutes in the refrigerator.
  • This is the time I used to get my charcoal going for the smoker, fry up some bacon, and make my crispy onion strings.
  • When your smoker is ready to go, put the patties on, close the lid, and wait. Then, go ahead and sneak that shot of whiskey and slice of bacon. No judgement here.
  • I smoked my burgers for about an hour. When I got them out they looked smoky, glazed and beautiful.

Smoked Patties

  • Next, build your burger however you like and pair with your favorite BBQ sides (which I was lacking at the moment).

Smoked Whiskey Bacon Burger

Overall, I thought this burger was pretty delicious and had a very deep smoky flavor. Very moist and cooked perfectly, I will definitely be making this again!

Let me know if you gave it a try in the comments below!

Recipe of the Month: BBQ Brisket

Happy June! We have another mouth-watering recipe for you to try.

I was talking to my boss about what recipe I should post and he suggested I look up Aaron Franklin’s Brisket. Oh. My. Gosh. What I saw was the most beautiful charred brisket I’ve ever seen in my life. I am a carnivore to the core and couldn’t wait to try this at home.

I stand behind these recipes. There’s no way I could in good conscience just post something random and let you fend for yourself. They are tested and eaten by yours truly. I will admit, the grill has not been my friend lately, and it’s something I am desperately trying to master, but I figured surely this time would be a success. Guess what…it was! I geared up and bought a coal chimney and everything.

Here is the Aaron Franklin video and description of the cooking method I used. I just used this as a guideline since I am still finding my way, but I’d say it worked.

Ingredients:

  • 1 Large or 2 Small brisket
  • 1/2 Cup salt
  • 1/2 Cup pepper
  • Water/Apple Cider Vinegar (optional)

Make It!

I do have an electric smoker, which I was told would be easier, but I just had to do it the tried and true way. I went to the store and bought a charcoal chimney. I also stepped away from the Match Light easy light stuff and bought basic charcoal briquettes.

  • I heated up the charcoal in the chimney for about 15 – 20 minutes and then dumped them in the smoker box, setting a couple hickory wood chunks on top.
  • This process was repeated about 3 times throughout the smoking.

Honestly, I did not measure my salt and pepper. As a salt lover I just covered every inch of the brisket and then some. And since I’m only cooking for two I used a small brisket, but threw on a whole chicken as well so I wouldn’t waste the space.

  • Put the brisket in your smoker, fat side up, and leave it.
  • You can place a metal bowl filled with water next to the meat to help with moisture. Or spritz the meat with apple cider vinegar every now and then, which is what I chose to do.

If you’re anything like me, this is the hard part: Just let your meat cook and leave it alone. I put it on the grill around 10:15am and let it cook for about 6 hours.

I tend to stress about the temperature and how long it is taking, but I simply researched how to manage the temp — something you must experiment with to get just right — and put my faith in that metal box.

While I think I probably should’ve left it in even longer, and mine didn’t look quite as charred and delicious as Aaron Franklin’s, I was happy with how it turned out. Now get your favorite BBQ sauce and look forward to those fatty bites with some of the salty edge…Yum!

(Unfortunately I forgot about it a little too well and didn’t get any pictures of the process)

Comment below with any tips or let us know how you did!

Recipe of the Month: Not your Caveman’s Chili!

Happy May 1st! Boy, are you in for a treat. From now on we will be sharing one new recipe a month to really give you some ideas on what to use your grass-fed beef for.

We are so excited for the warmer weather we’re getting and all the other wonderful things Spring brings (try saying that 3 times fast). So at start of grilling season why am I reverting back to Winter with a chili recipe!?

Bear with me y’all. This is the best chili, and my personal favorite. In fact, I literally have all the ingredients sitting on my counter at this moment so I can get a pot going once I get home. I don’t know who came up with the rule that chili and soups are Winter foods only but after you try this you’ll ignore that just like I do. Plus this recipe mostly uses a slow cooker, reducing time at the stove and ultimately the added heat of cooking, which of course we don’t want in these temps. Just put it all together and forget about it for a couple hours!

We love all carnivorous ways of eating and plan on incorporating all sorts of recipes for any type of diet involving meat. This particular recipe happens to be keto-friendly. For those unfamiliar with the term it translates to “low-carb deliciousness.” OK, not really, but it might as well. That’s right, this recipe is low-carb which means it doesn’t contain beans and other high-carb foods. That may seem crazy for a chili but I promise you won’t even notice. Besides, it is something you can easily modify!

First, I have to give credit where credit is due. This is not my own recipe. I’ve borrowed it from http://www.ruled.me

INGREDIENTS:

  • 2 pounds stew meat (or 1 pound stew and 1 pound ground)
  • 1 medium onion
  • 1 medium green pepper
  • 1 cup beef broth
  • 1/3 cup tomato paste
  • 2 tablespoons soy sauce
  • 2 tablespoons olive oil
  • 2 tablespoons + 1 teaspoon chili powder
  • 1 1/2 teaspoons cumin
  • 2 teaspoons Red Boat Fish Sauce
  • 2 teaspoons minced garlic
  • 2 teaspoons paprika
  • 1 teaspoon oregano
  • 1 teaspoon cayenne pepper
  • 1 teaspoon worcestershire sauce
  • 1 teaspoon black pepper
  • 1 teaspoon salt
  • *Optional: 1 cup coffee for more watery chili

A few notes:

  • You do want stew AND ground beef, however you can either buy a pound of ground beef or make your own using a food processor or meat grinder.
  • I have personally never used the fish sauce. I have read that Red Boat is the best brand and I cannot find that in my local stores, but I still thought the chili had great flavor.
  • I have also never tried the coffee trick. I like my chili thick!
  • This chili does have a little kick to it but is not extremely spicy. You can definitely cut back on the chili powder or cayenne for a milder flavor.

LET’S MAKE IT!

  • Grind half your stew meat (if doing this on your own), prep the veggies, and get your spices gathered and ready.
  • To make the sauce combine the beef broth, tomato paste, soy sauce, chili powder, cumin, fish sauce (optional), minced garlic, paprika, oregano, cayenne pepper, worcestershire sauce, and coffee (optional). Set aside for later use.
  • In a pan bring 2 Tbsp. olive oil to its smoking point then add the stew meat to the pan. As it cooks you can pour the excess juice into your slow cooker. Cook until browned and transfer to the slow cooker.
  • Next, add the ground beef to the pan and season with the salt and pepper. When this is finished you’ll add it to the slow cooker as well.
  • In the same pan, cook your chopped green pepper and onion until translucent then add to the slow cooker.
  • Remember that sauce you made in the beginning? Guess where you’re adding it…Stir everything together in the slow cooker and let simmer on high for 2 1/2 hours.
  • When the time is up, take the lid off and let the sauce reduce for 20-30 minutes.
  • Serve! You can add your favorite garnishes such as cheese, onions.

Makes about 4 servings, each serving coming out to about 398 Calories, 17.8g Fat, 5.3g Net Carbs (total carbs minus the fiber), and 51.8g Protein.

MODIFICATIONS;

The ground beef in this recipe is meant to provide a bean-like texture, however if you do not have any dietary restrictions you can definitely add any sort of beans or veggies you may want!

Let us know in the comments if you tried this chili and what you thought! Also, share with us your own recipe ideas. You may even see it featured as a Recipe of the Month someday!